Example 2: ODoE Generating New Candidate Set
In this example, the user will generate a new candidate set.
Start FOQUS and click the ‘SDoE’ icon.
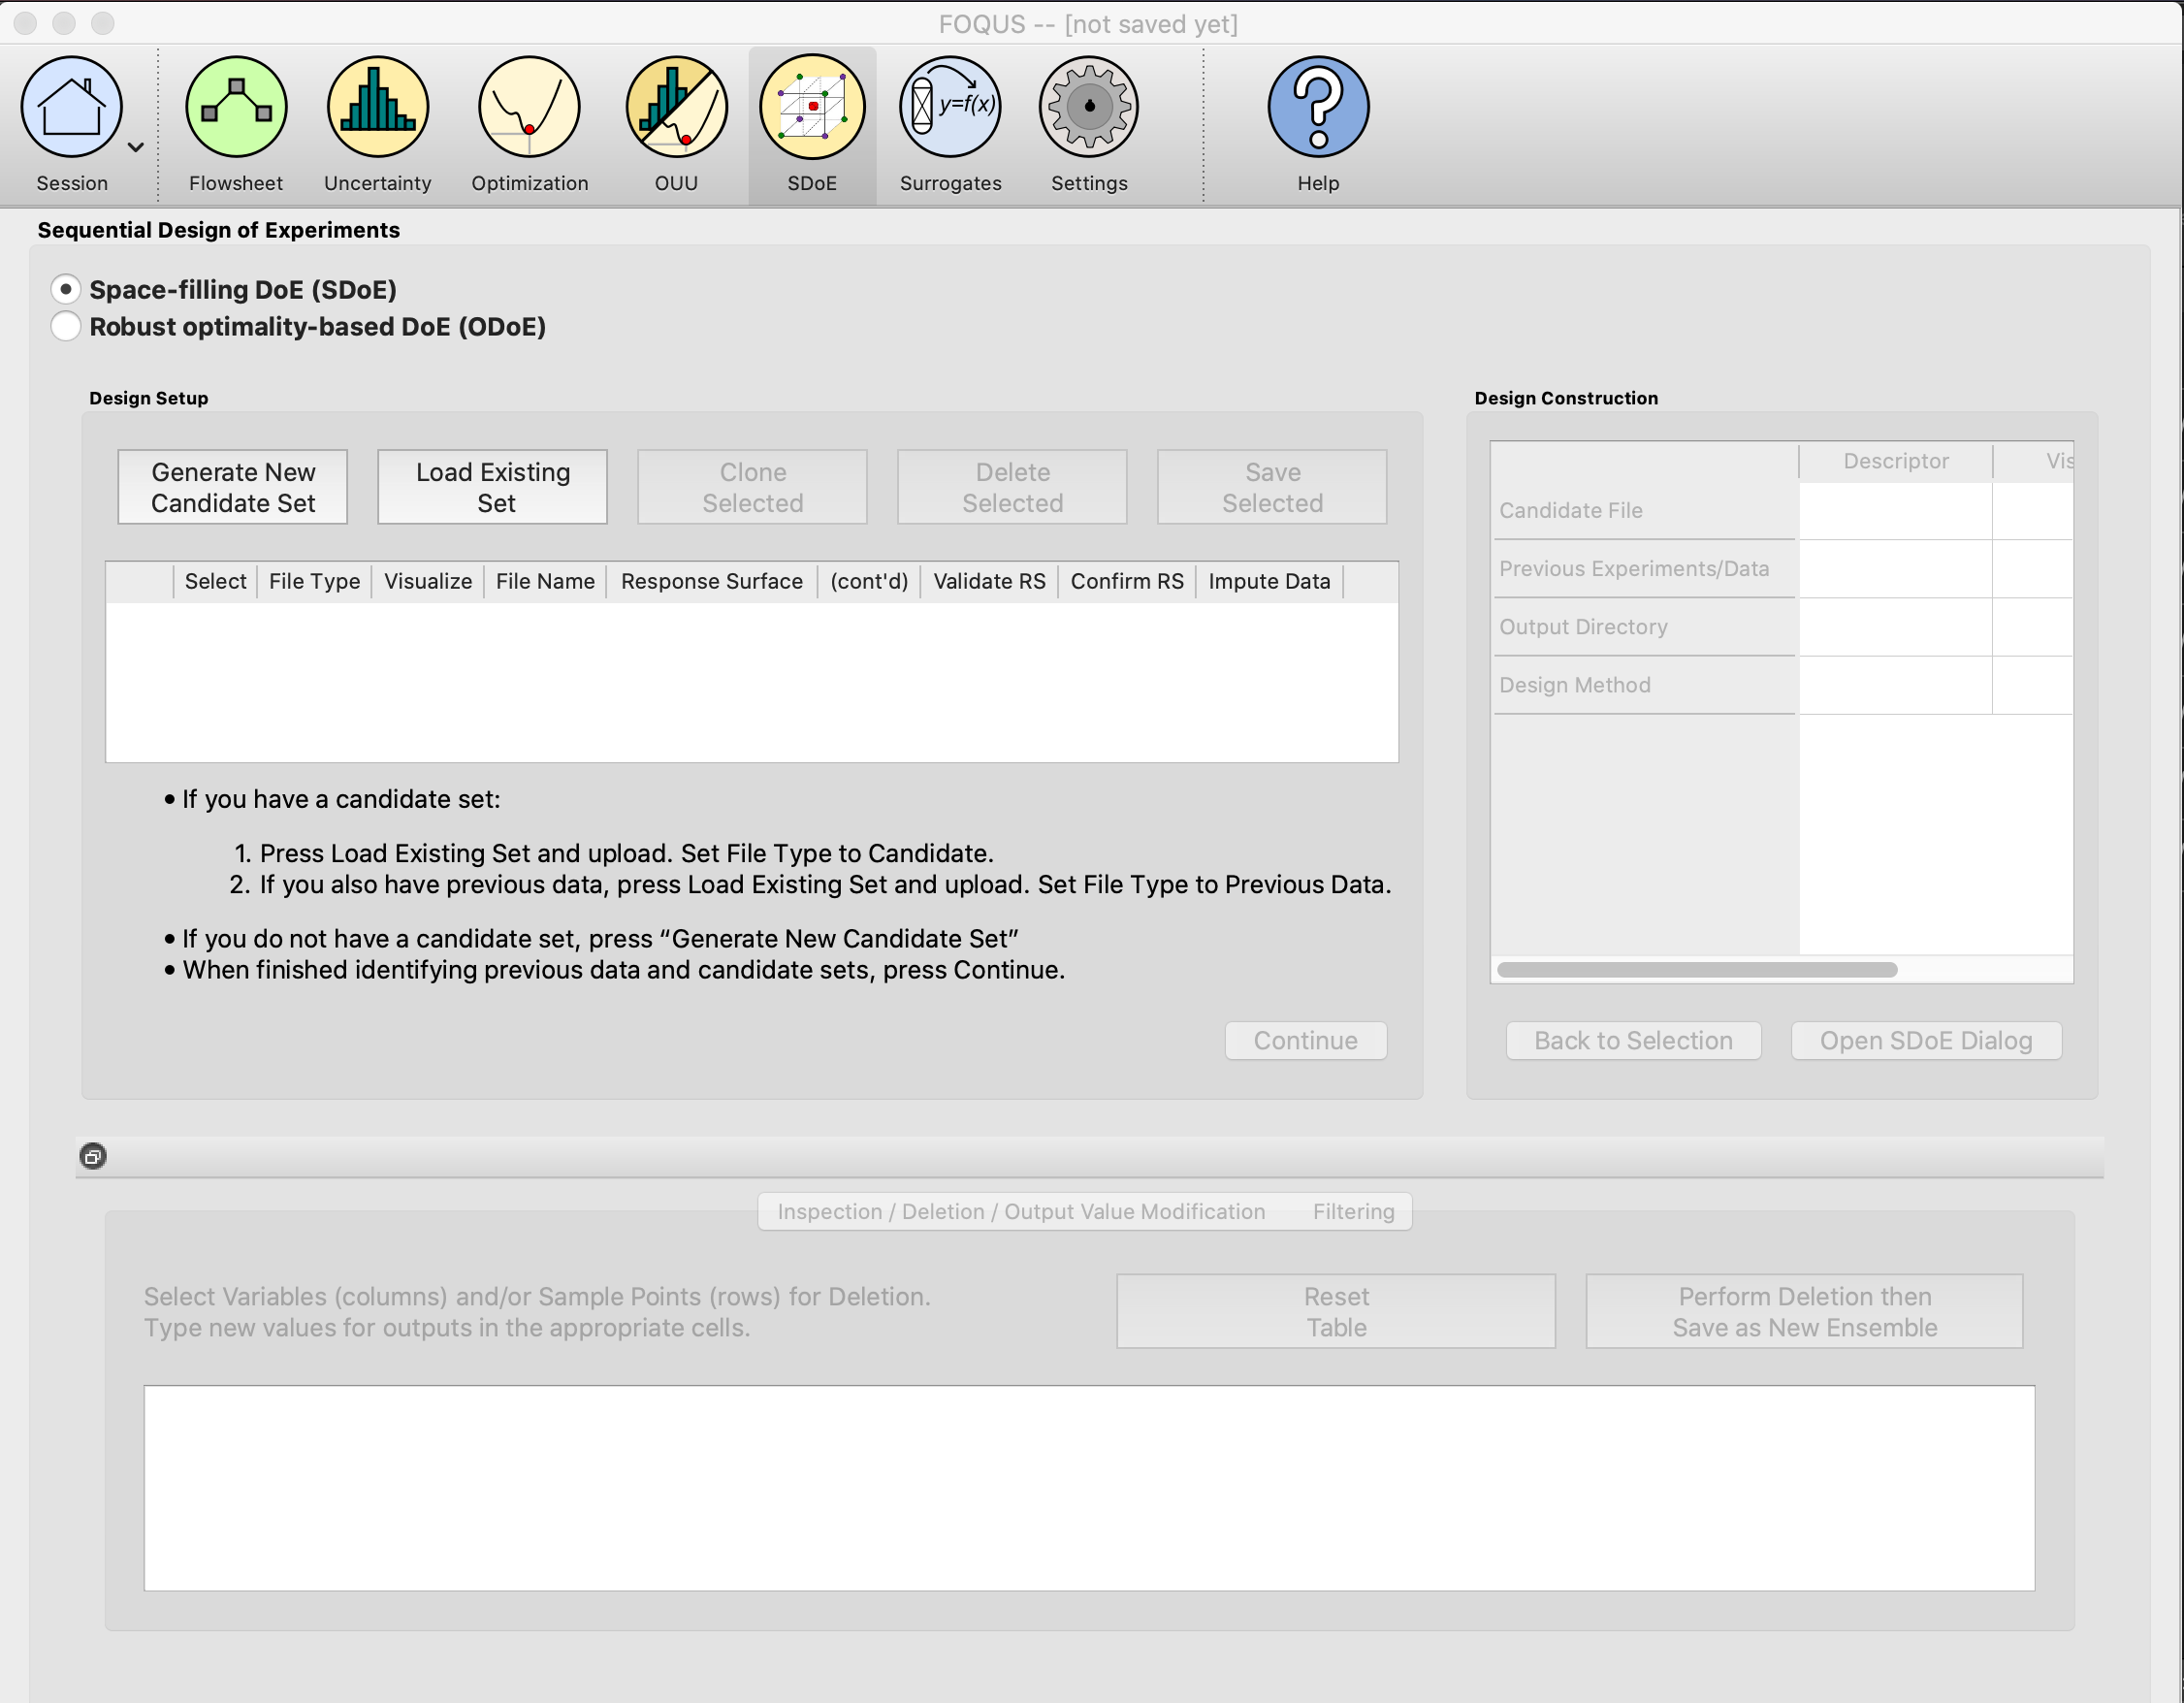
SDoE Main Window
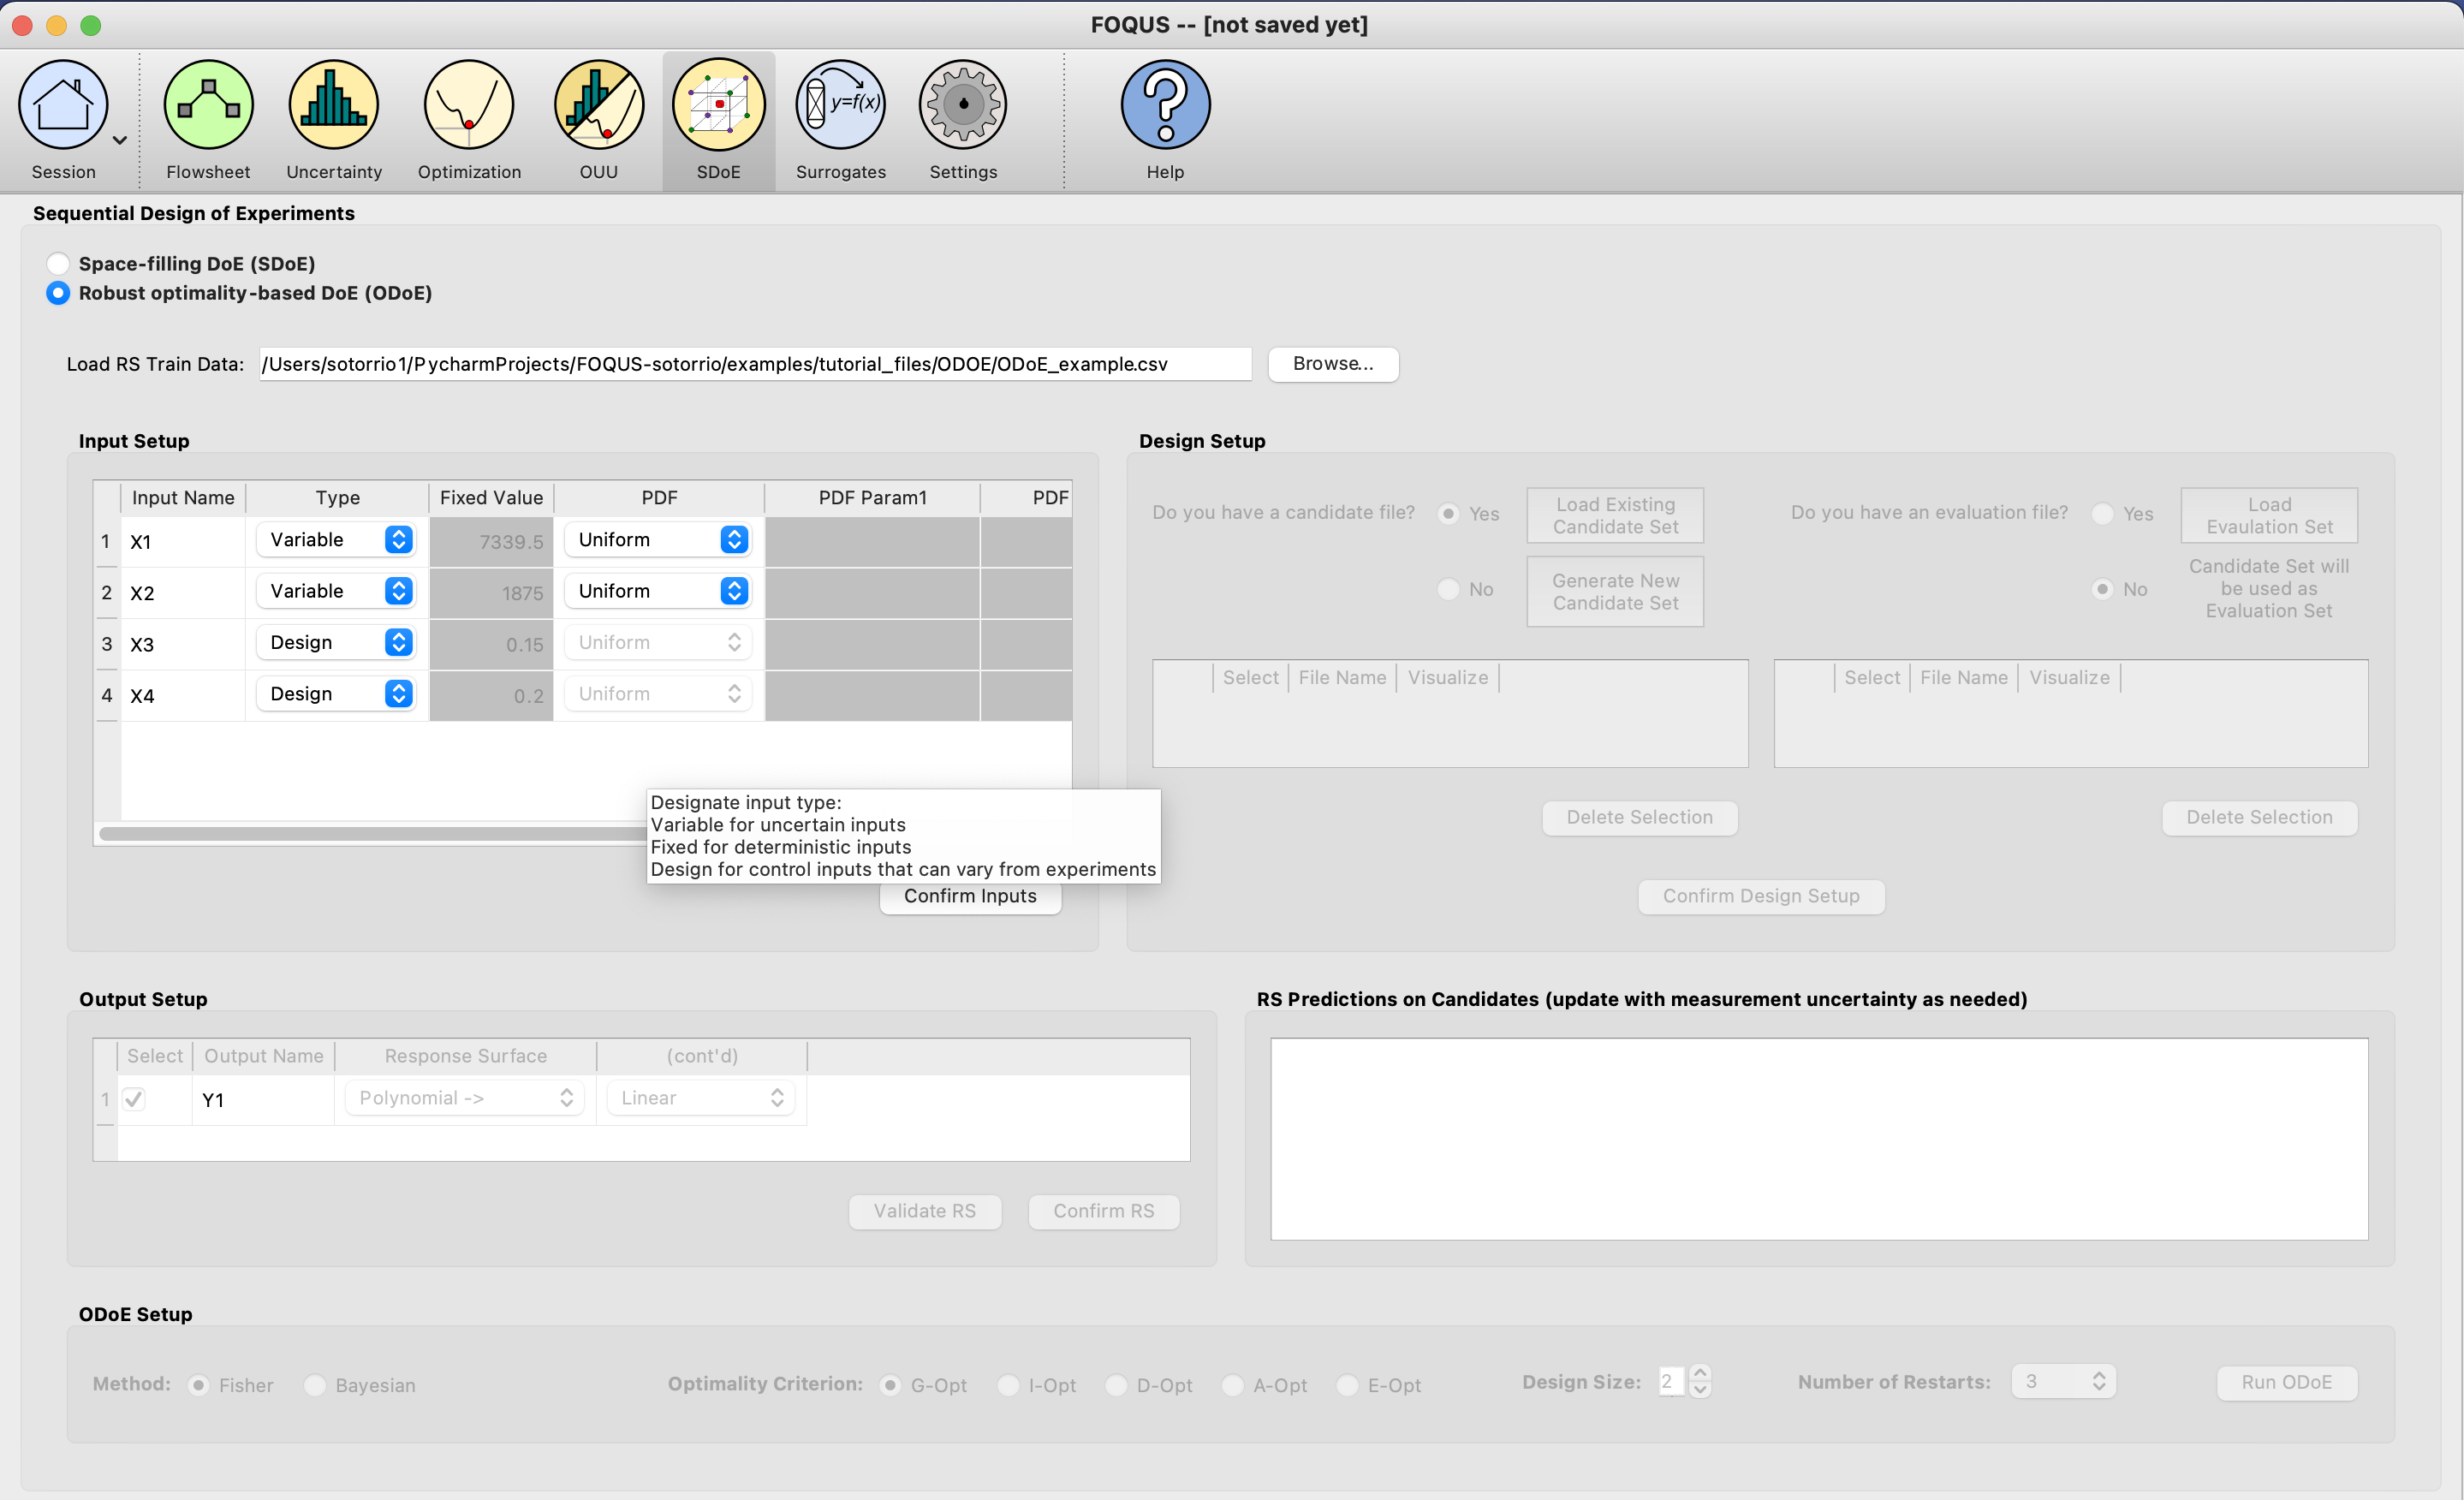
Select the radio button Robust optimality-based DoE (ODoE)
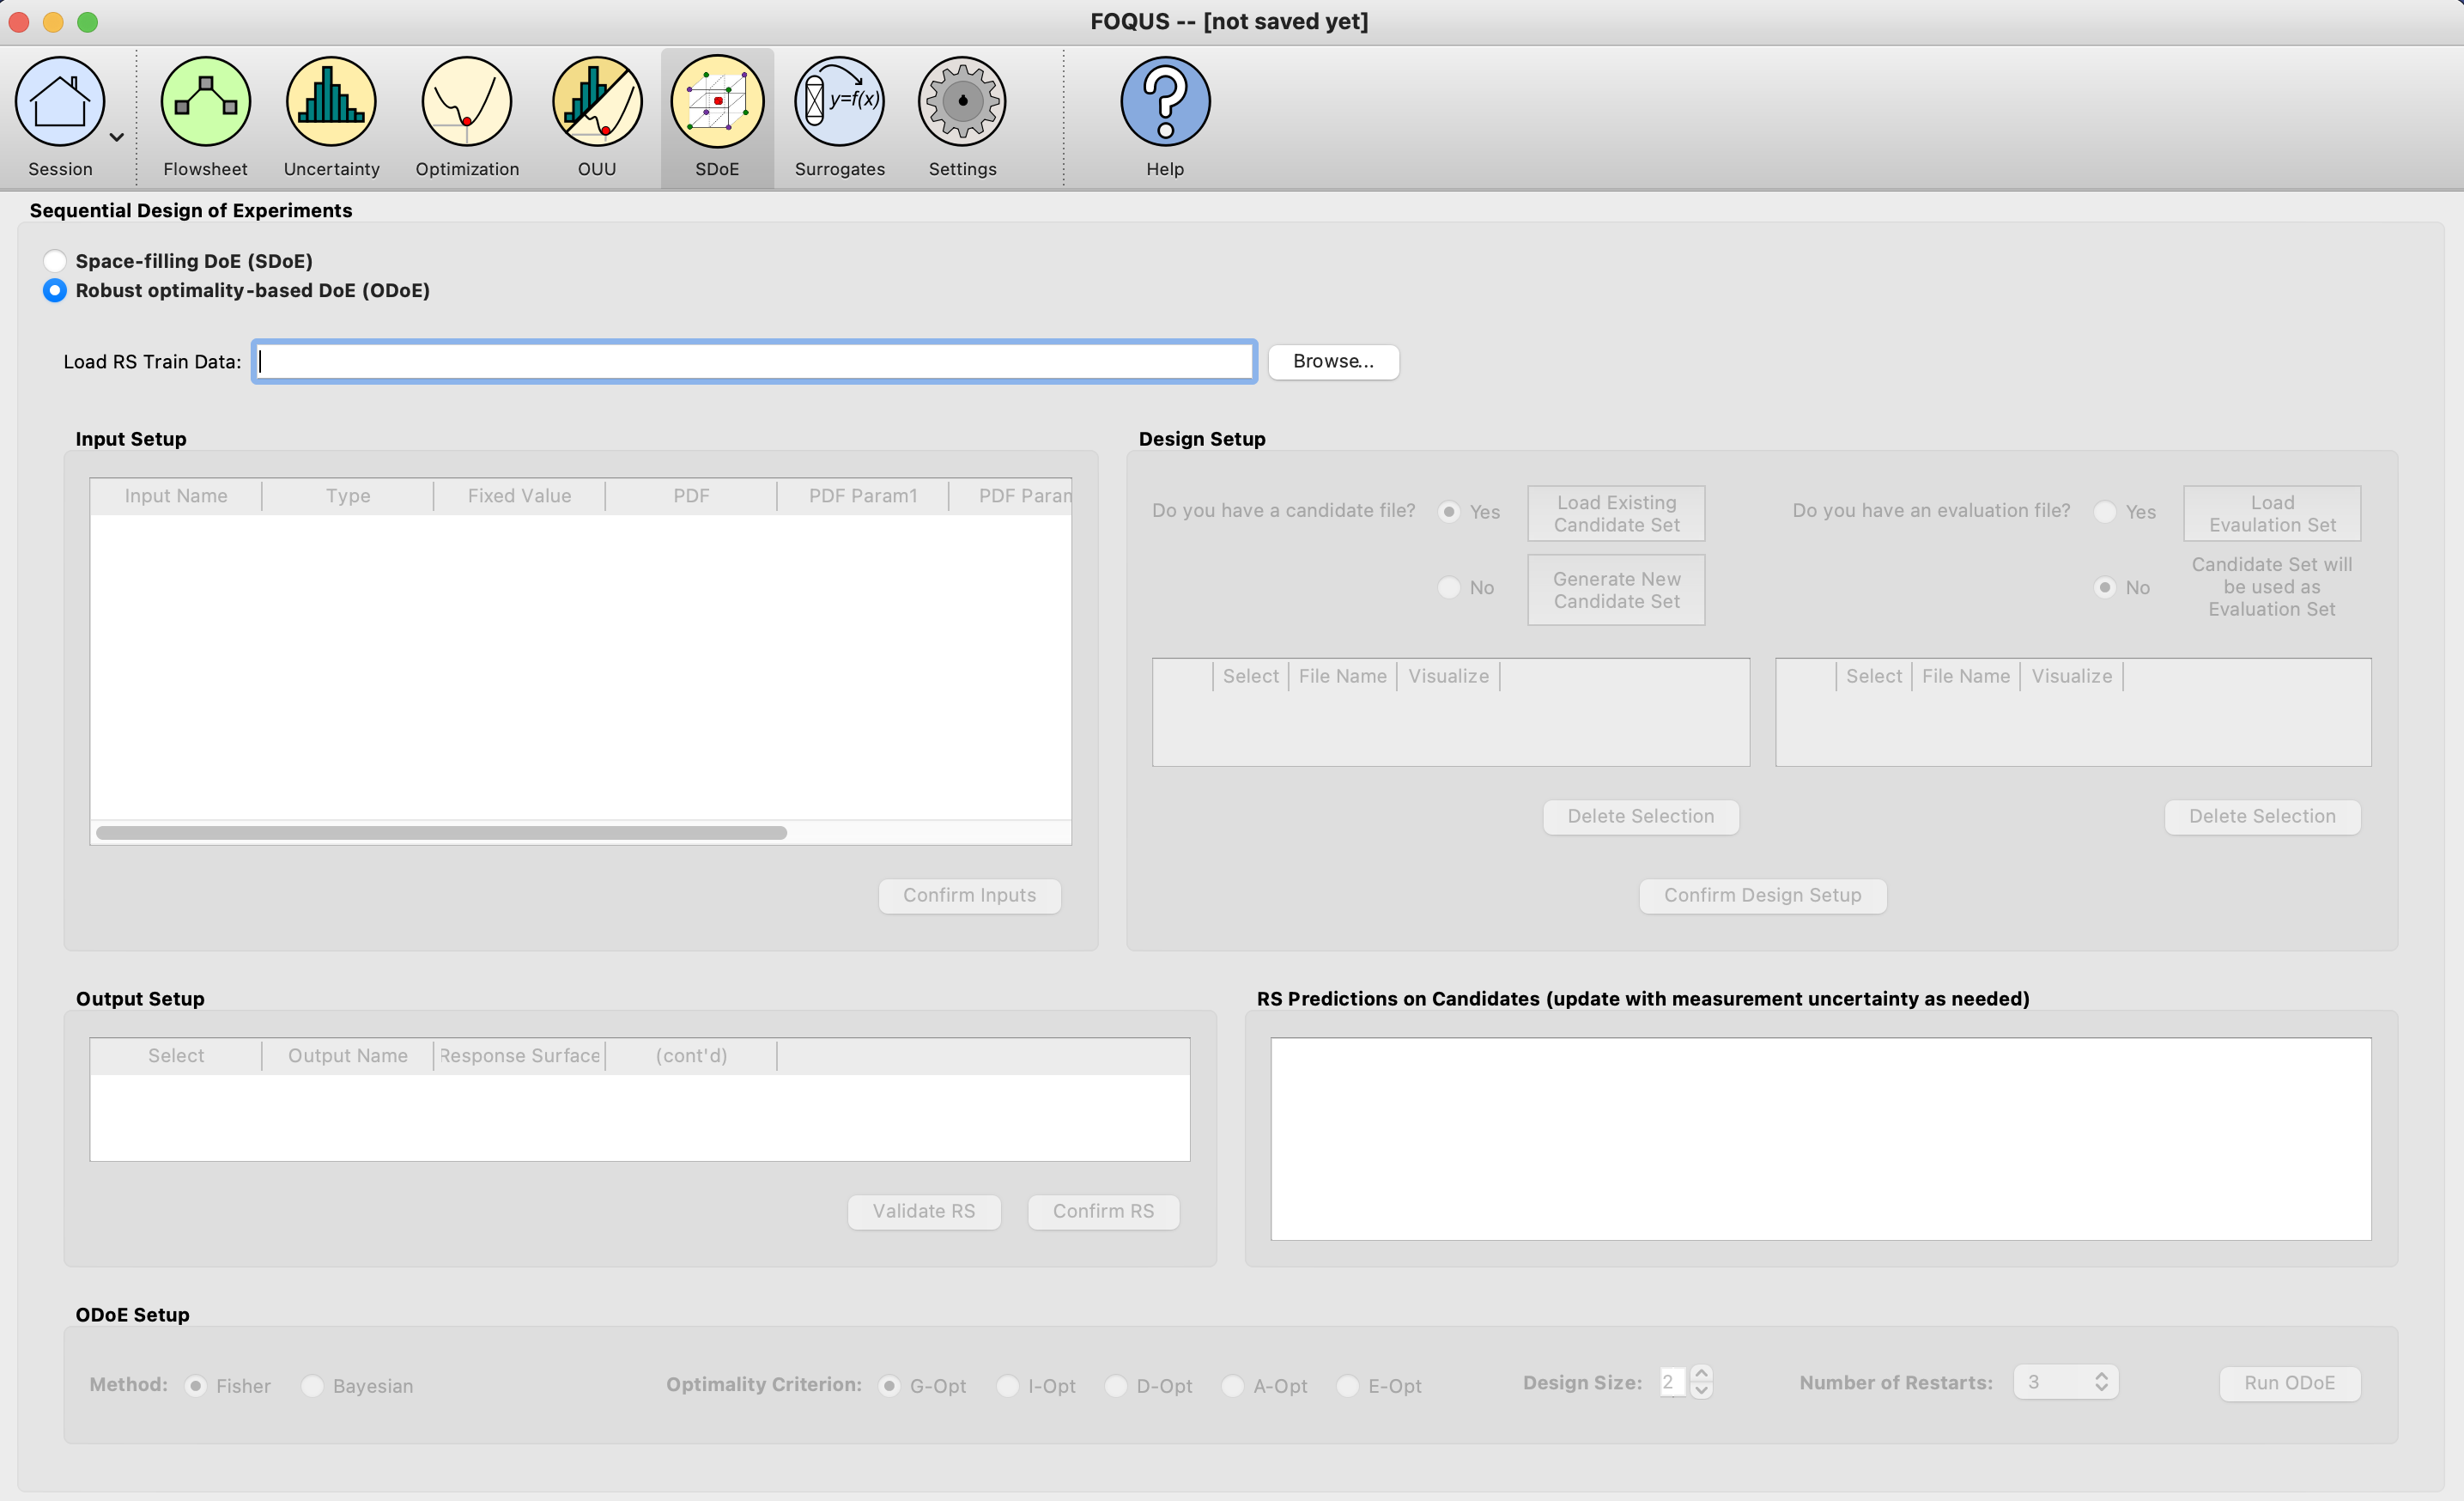
ODoE Main Window
Click the Browse button to Load RS Train Data, browse and load the ODoE_example.csv from the examples folder.
First you will be prompted to specify the number of inputs in your training data.
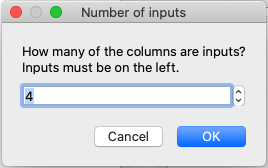
ODoE Specify Number of Inputs
After clicking OK the file loads and the screen will look like this:
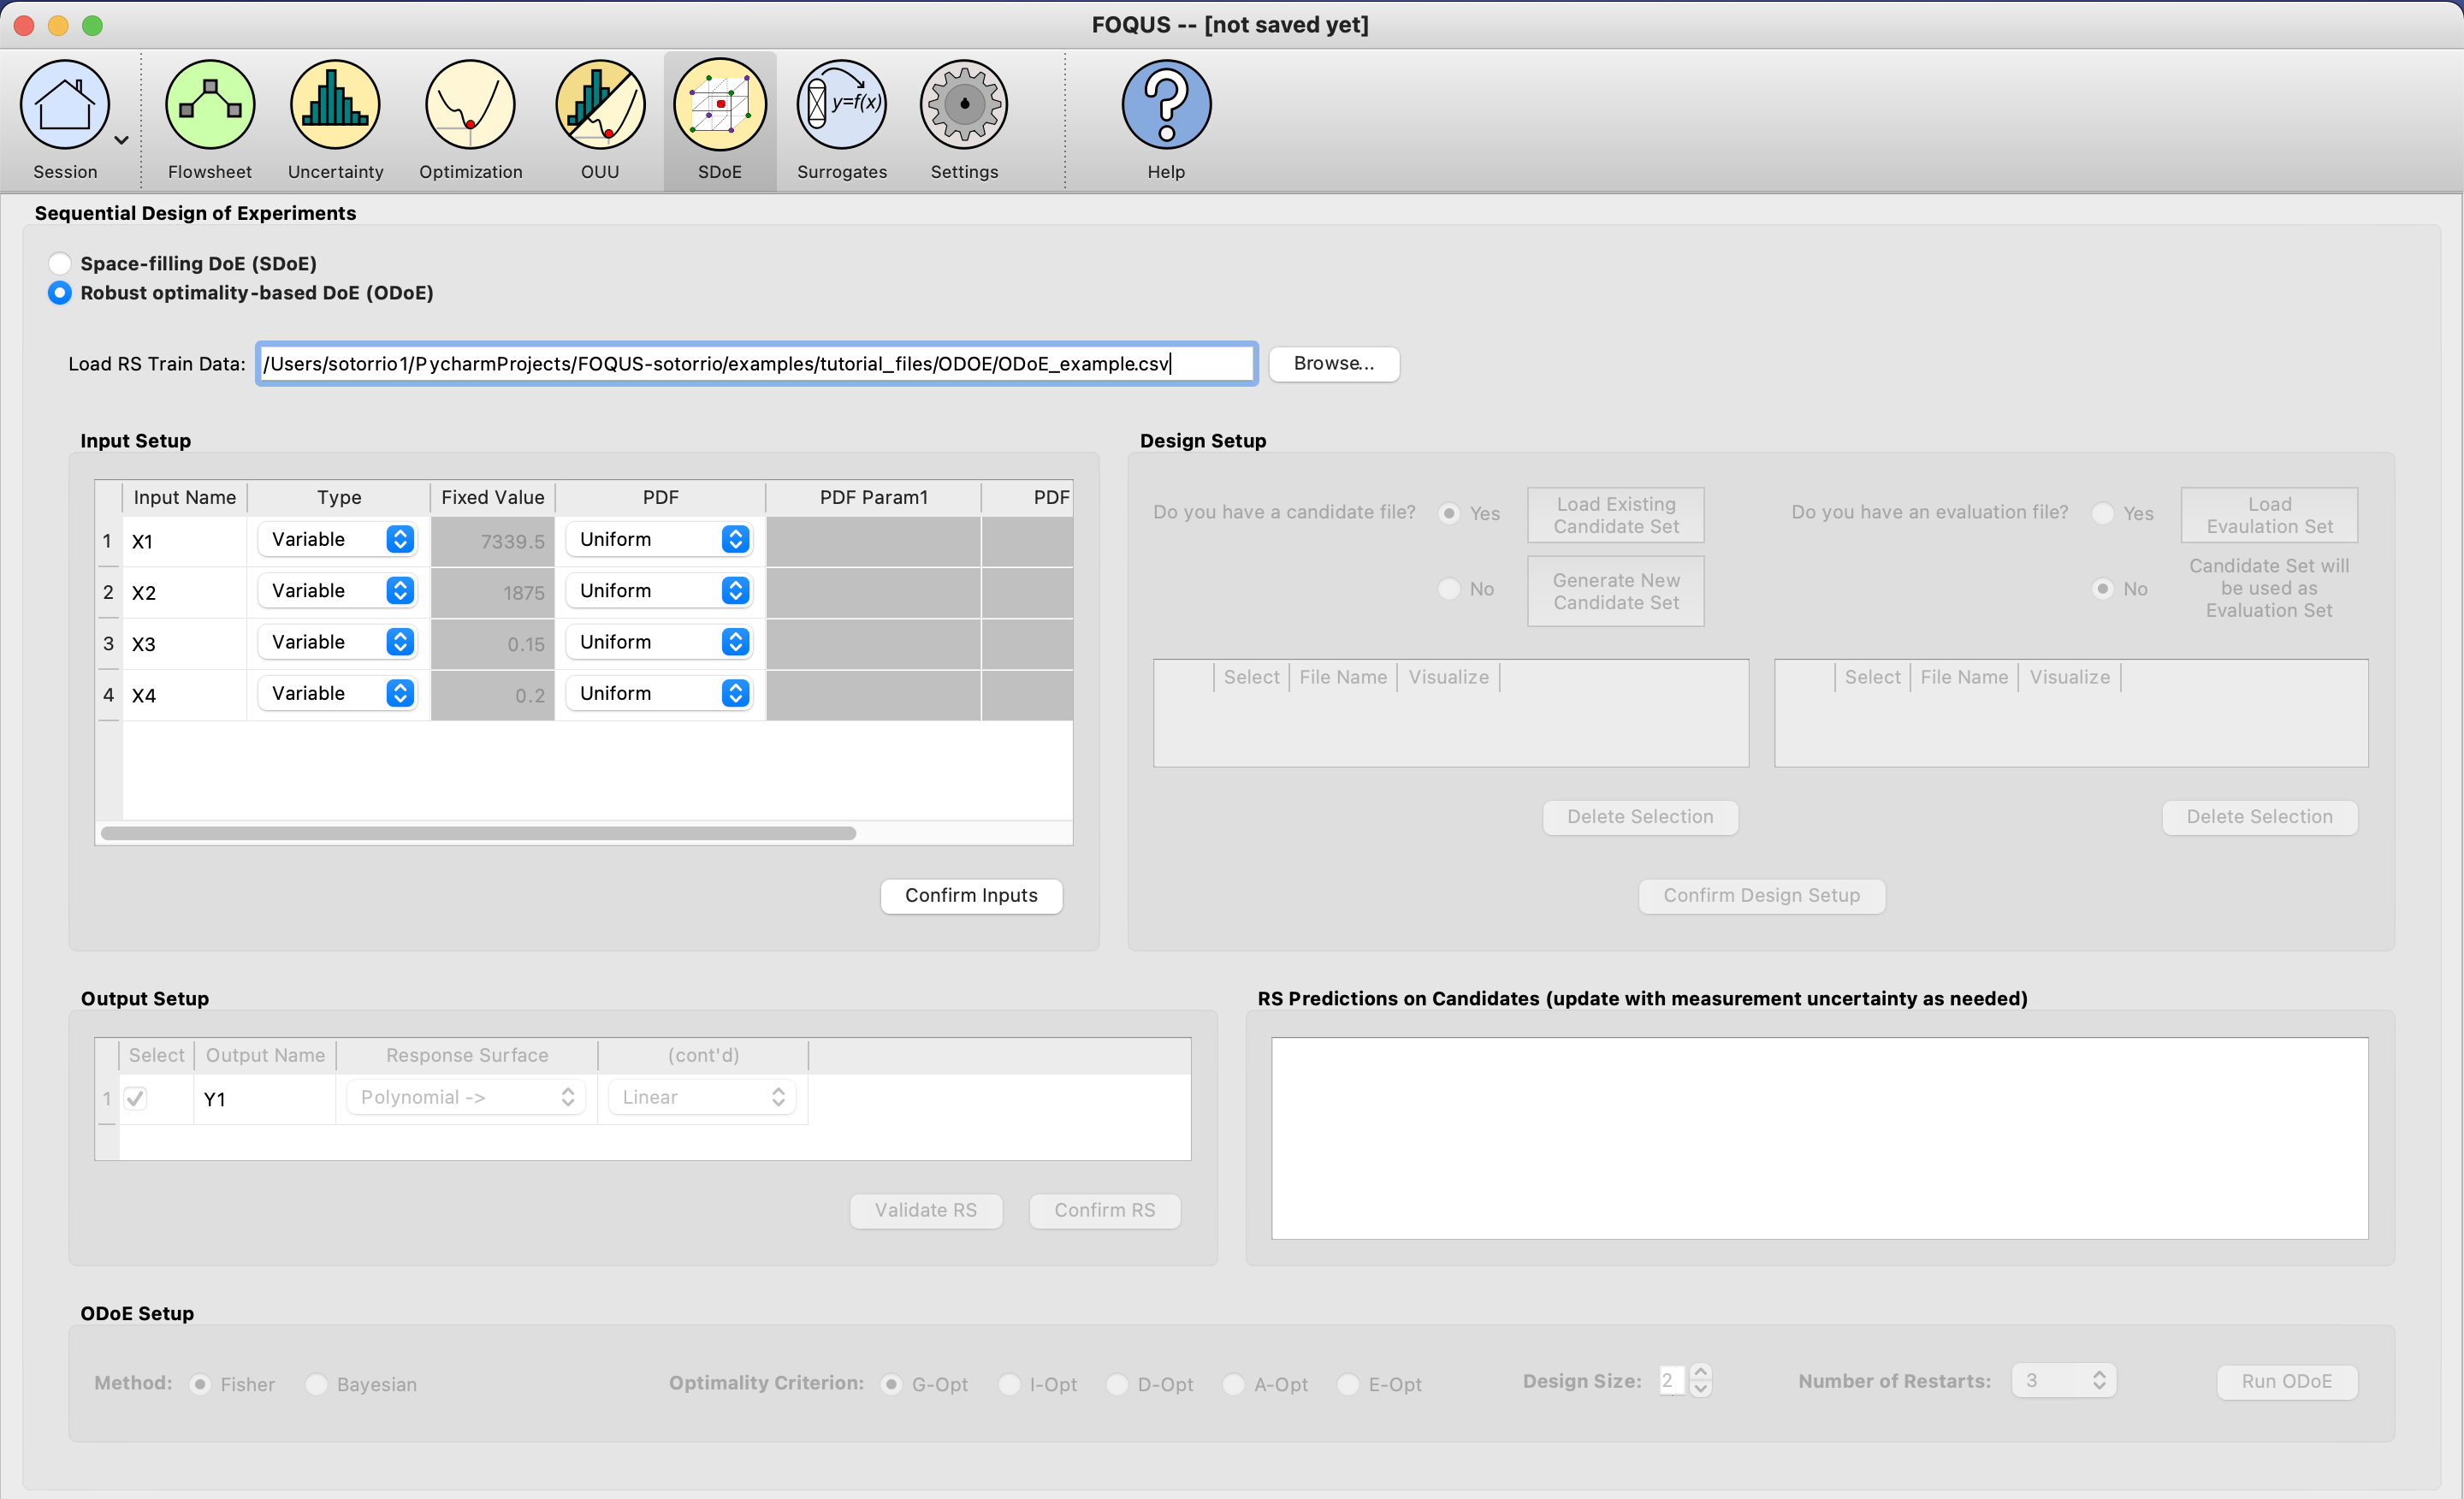
ODoE Load RS Train Data
Under Input Setup we need to select the type for each input. Leave X1 and X2 as Variable inputs and change X3 and X4 to be Design inputs.
ODoE Input Setup
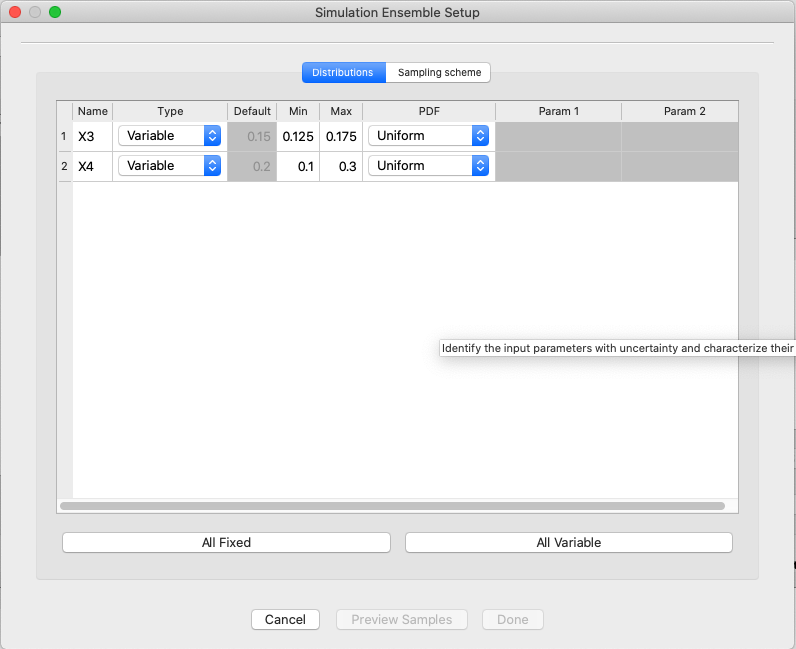
Click Confirm Inputs and the Simulation Ensemble Setup window will pop up to generate our Prior Sample.
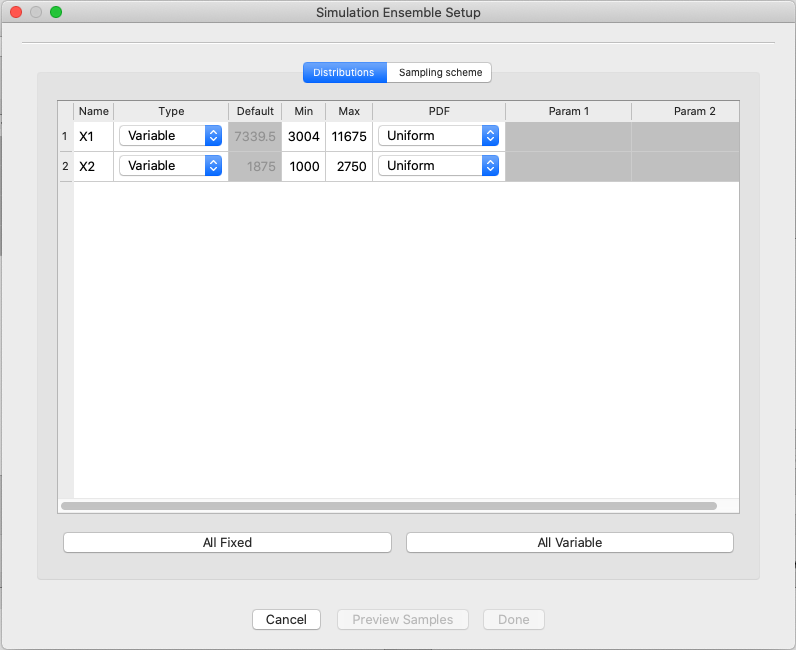
ODoE Simulation Ensemble Setup for Prior Sample Generation
Switch to the Sampling Scheme tab and select Monte Carlo and leave the # of Samples at 1000. Click Generate Samples. When the samples are generated, Done! will show up right next to the button. You can visualize the samples clicking on the Preview Samples button. Once the user is done, click the Done button so the generated samples get saved.
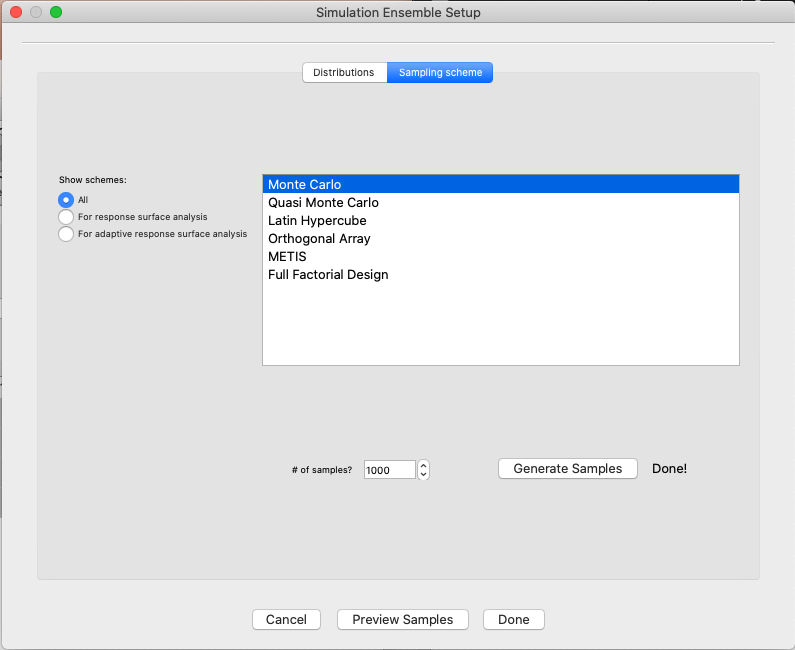
ODoE Simulation Ensemble Setup for Prior Sample Generation - Sample Scheme
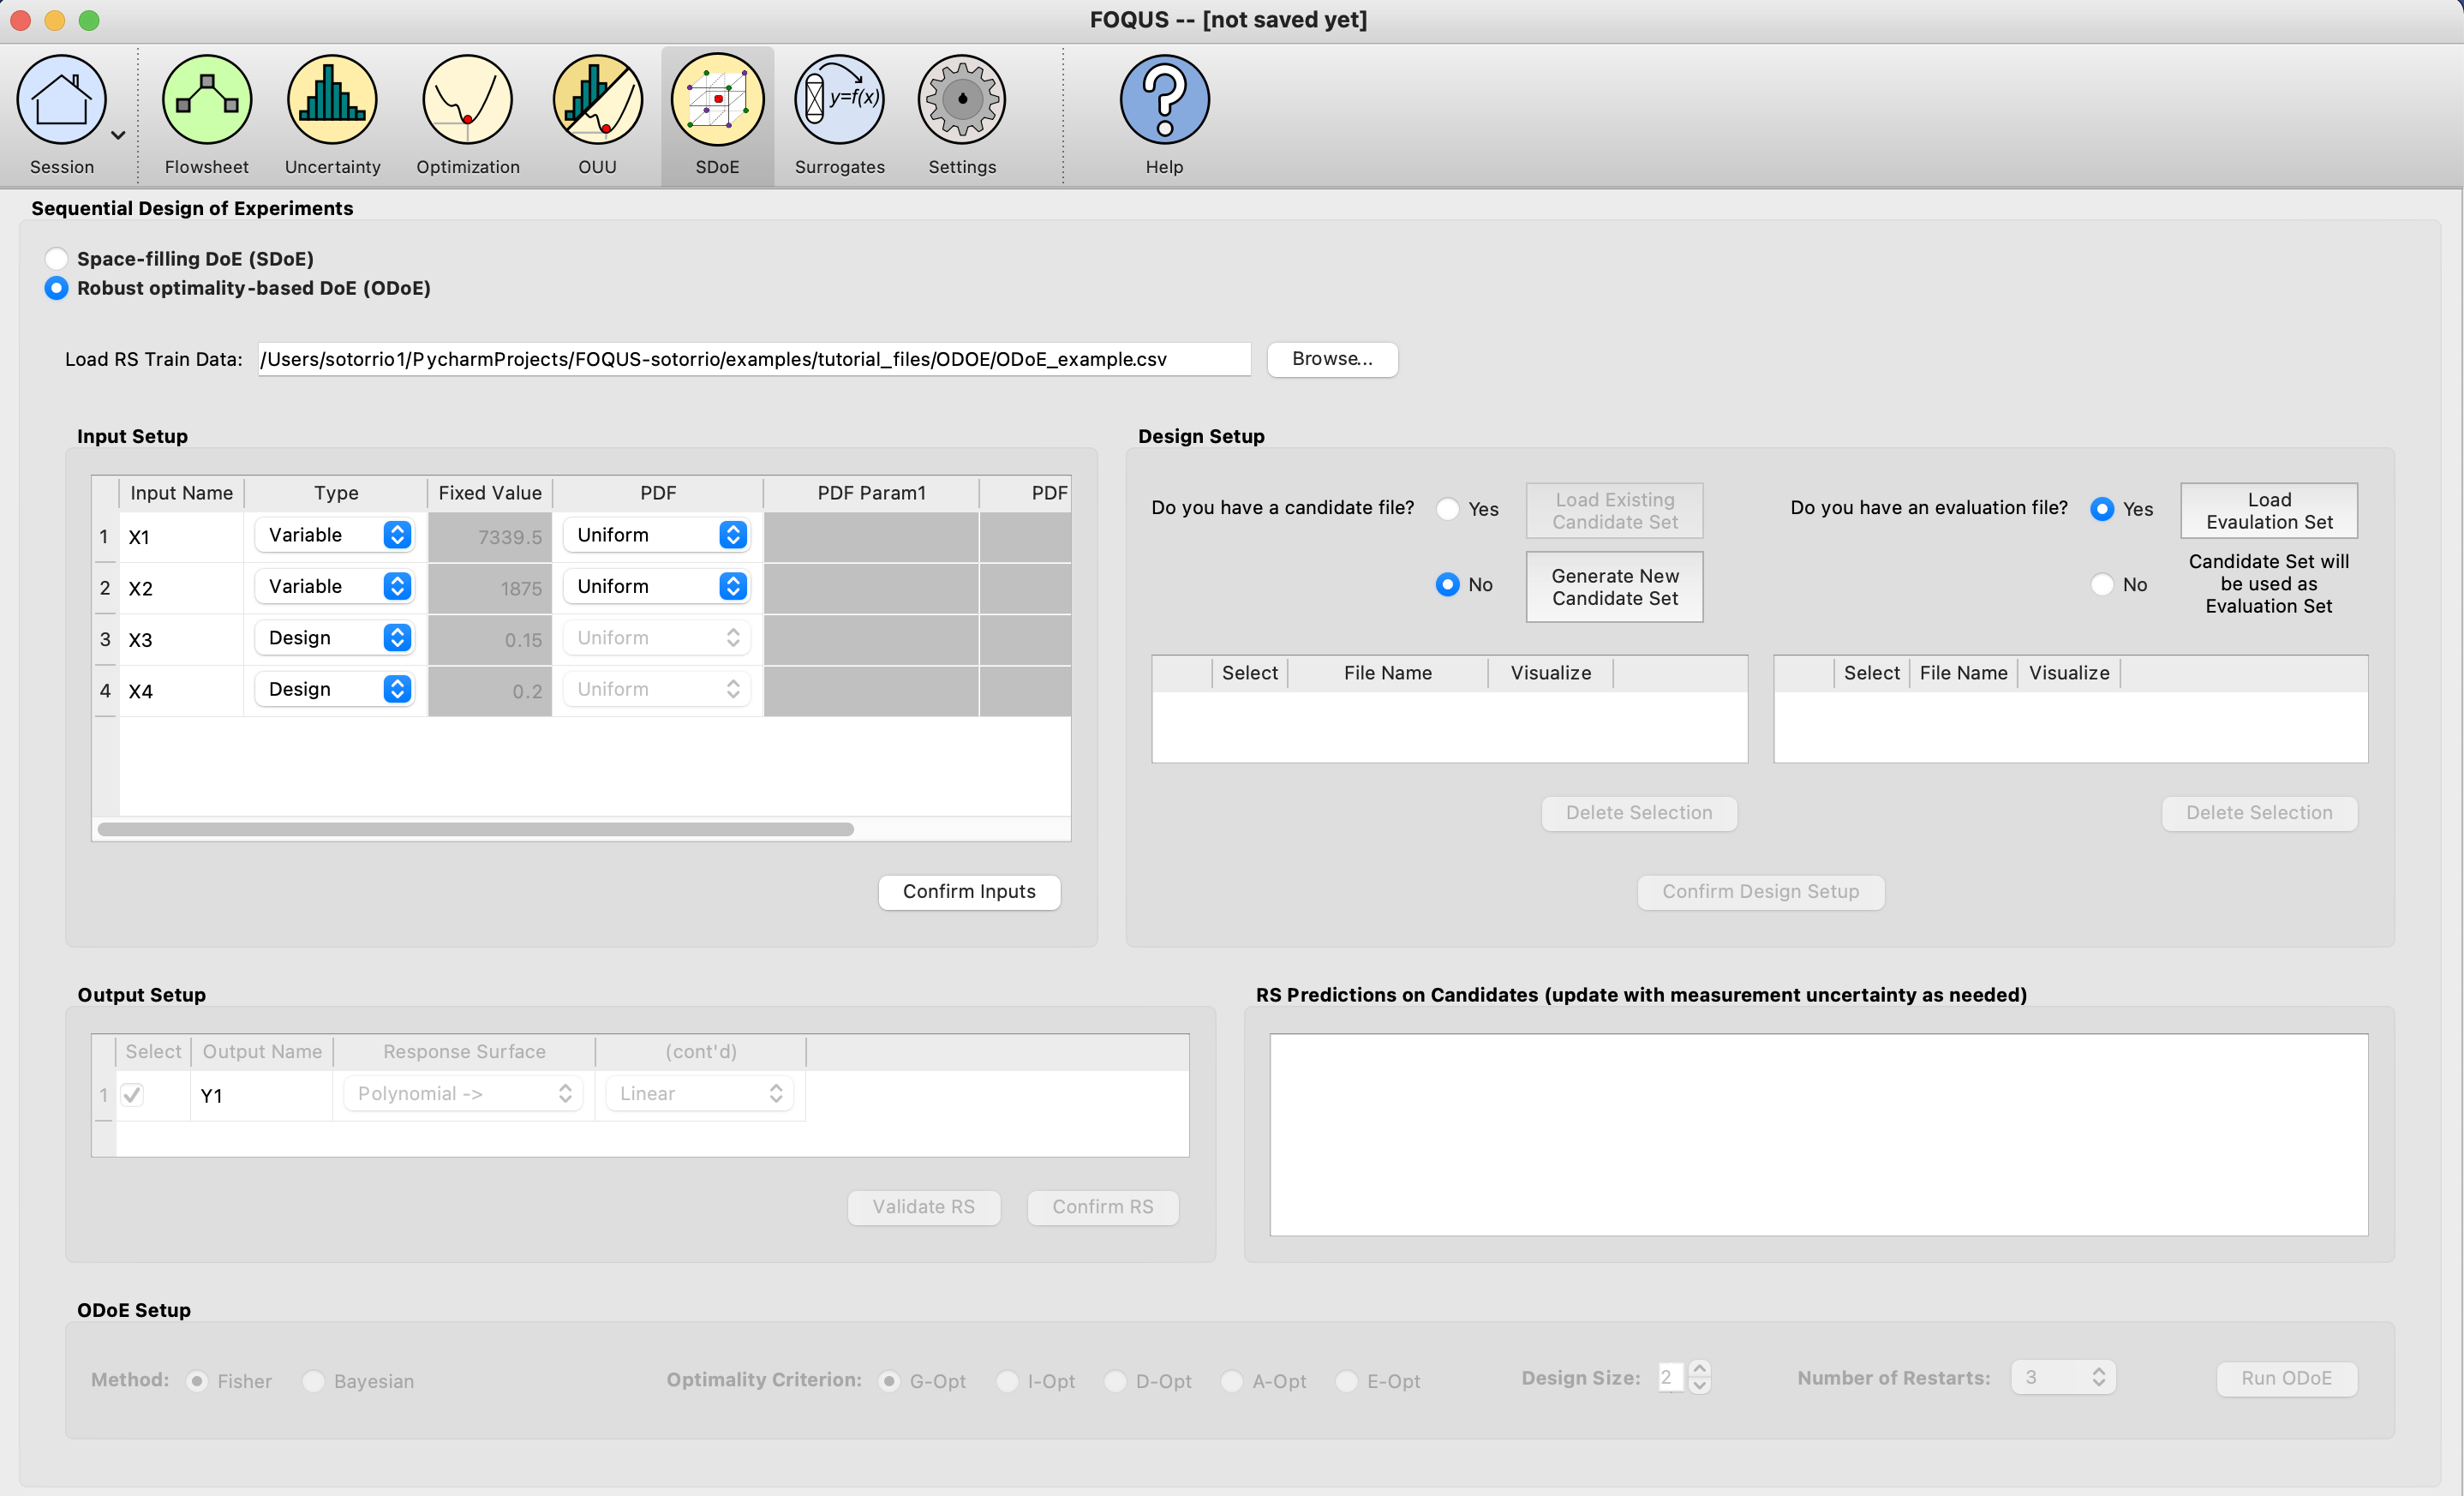
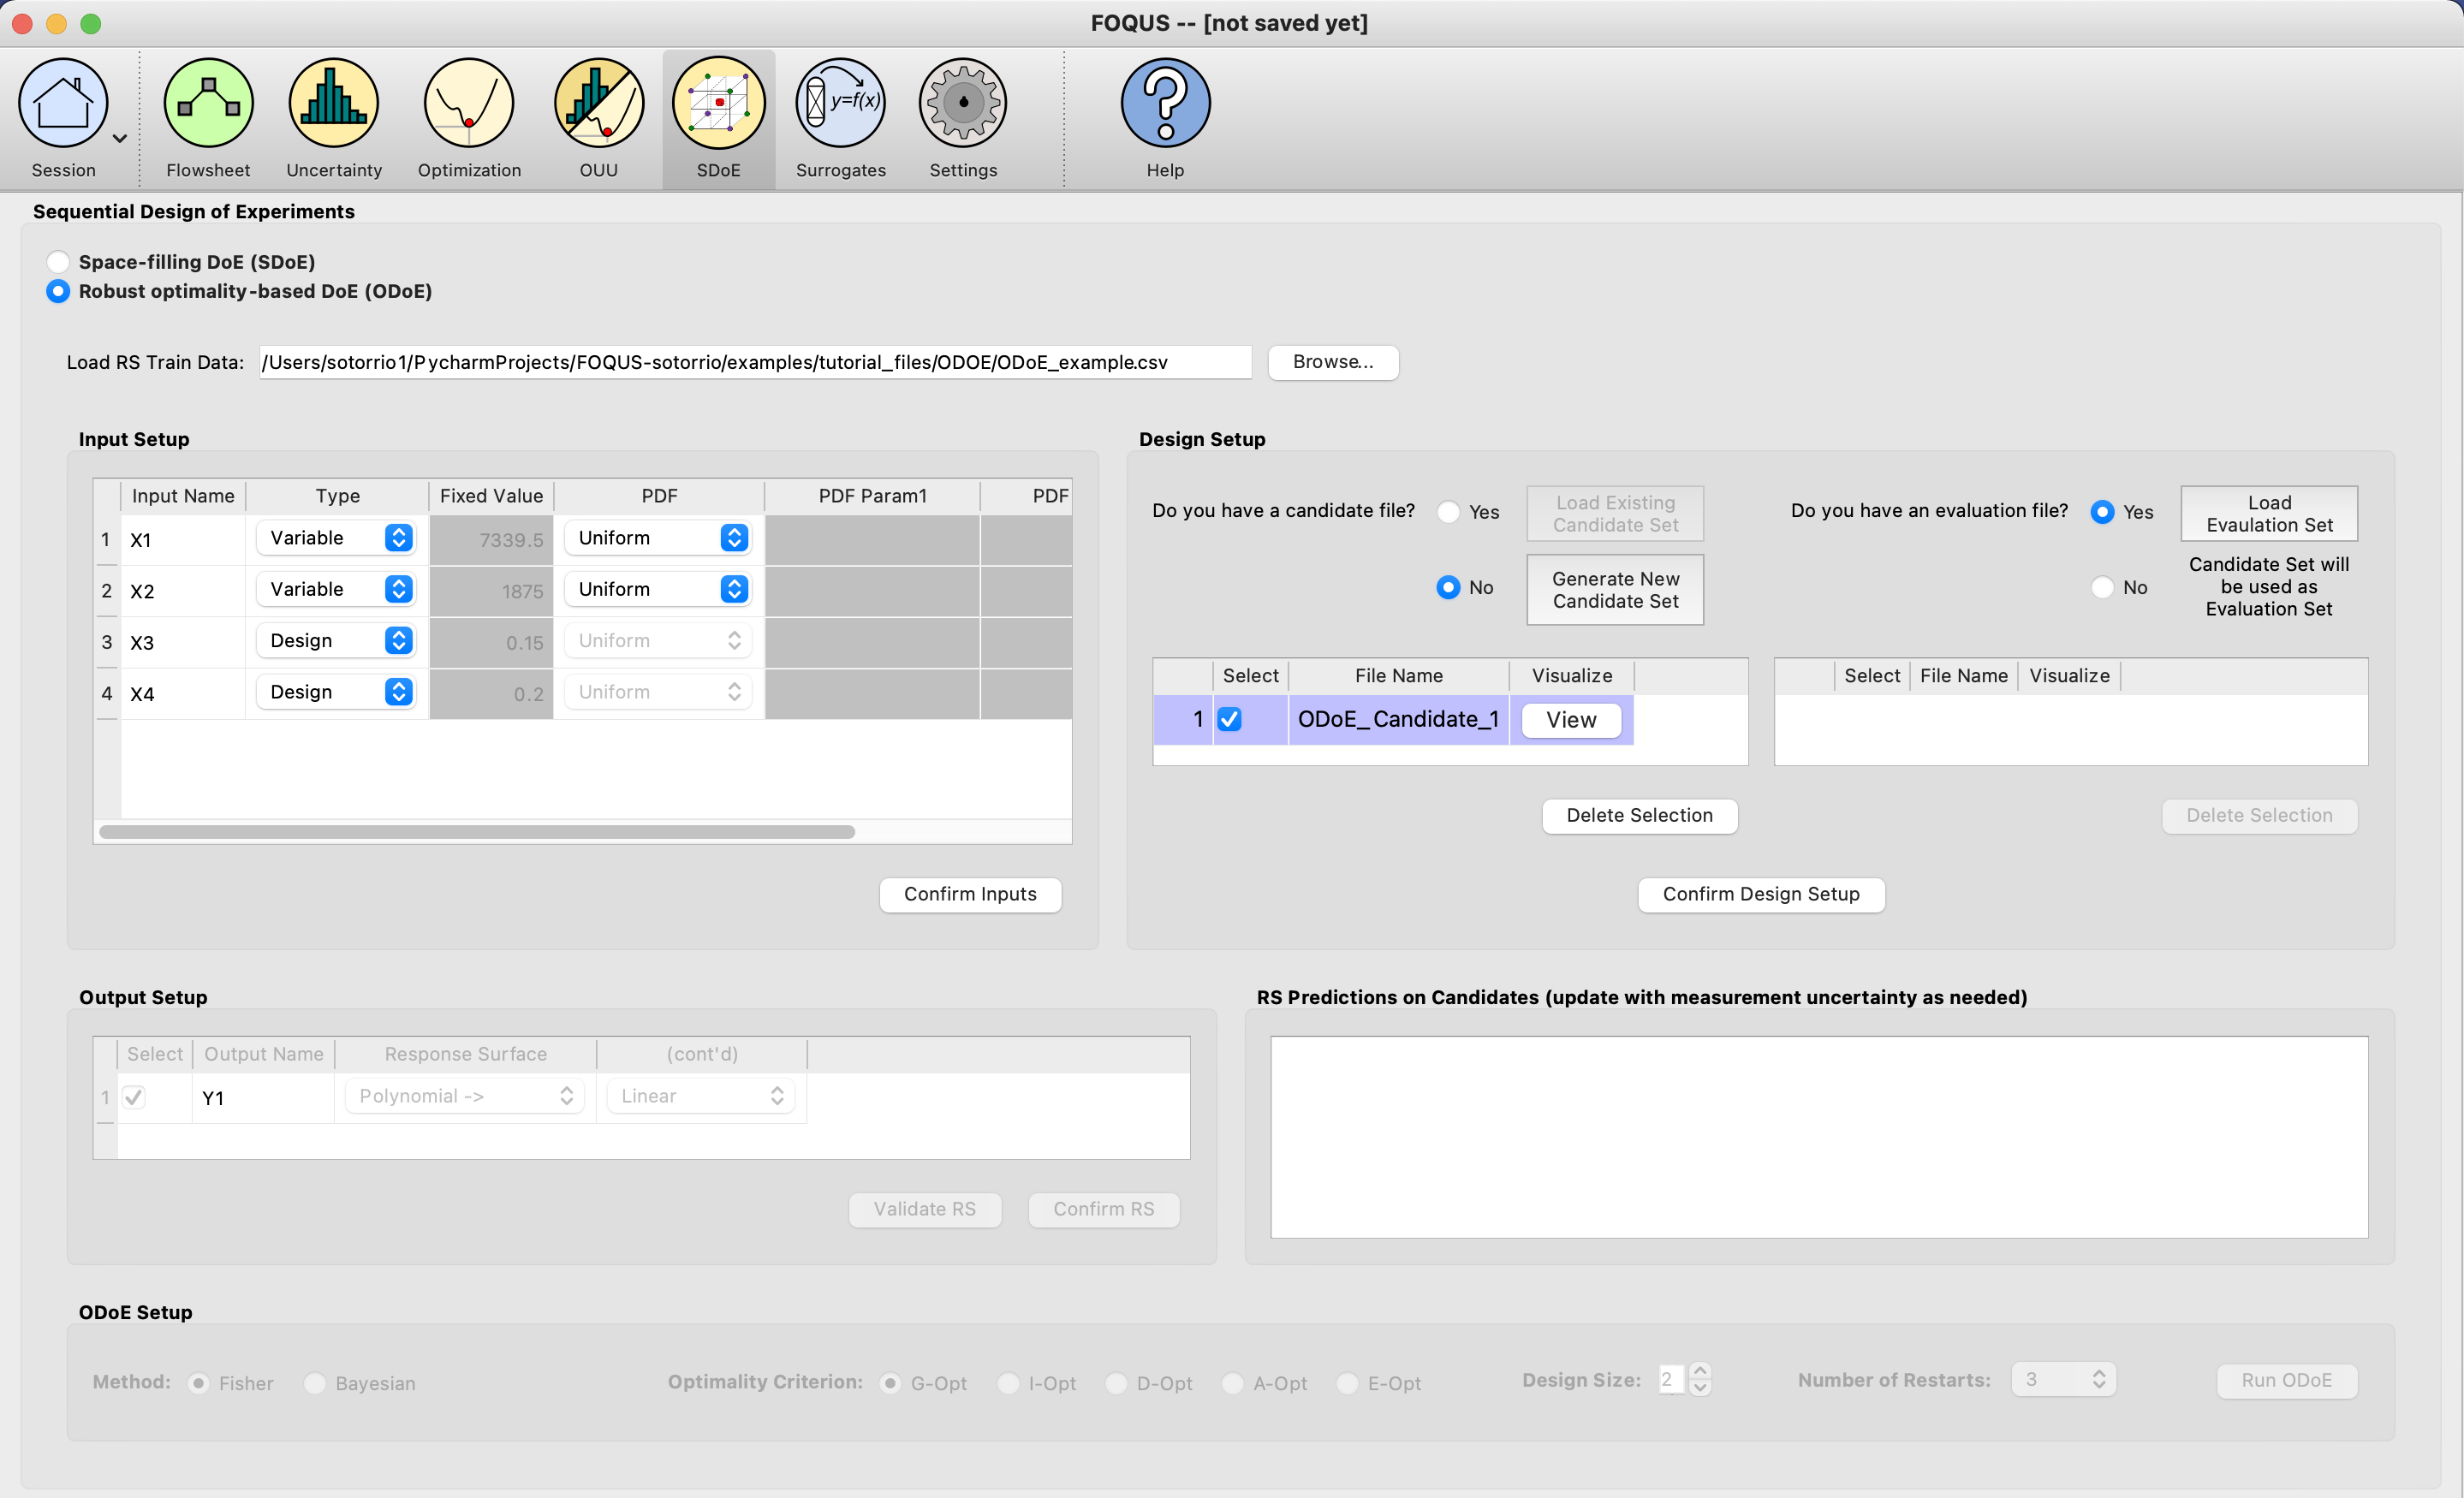
Under Design Setup click on the Generate New Candidate Set button.
ODoE Generate New Candidate Set
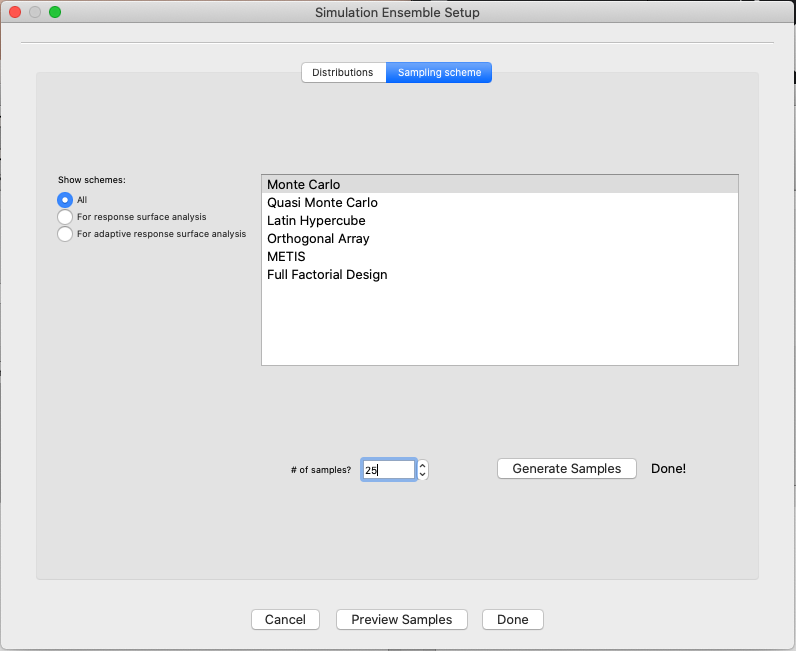
The Simulation Ensemble Setup window will pop up to generate our candidate set.
ODoE Generate New Candidate Set - Simulation Ensemble Setup
Switch to the Sampling scheme tab and select Monte Carlo and 25 samples. Click Generate Samples. When the samples are generated, Done! will show up right next to the button. You can visualize the samples clicking on the Preview Samples button. Once the user is done, click the Done button so the generated samples get saved.
ODoE Generate New Candidate Set - Sampling Scheme
The user can select the candidate set and click on the Delete Selection button in case they want to delete the candidate set. To visualize the data, just click the View button under the Visualize column.
On the right hand side of the Design Setup section, click on the Load Evaluation Set button.
ODoE Load Evaluation Set
Browse and load the EvaluationSet.csv file from the examples folder. Similar to the candidate set section, the user can select the evaluation set and click on the Delete Selection button in case they want to delete the evaluation set. To visualize the data, just click the View button under the Visualize column.
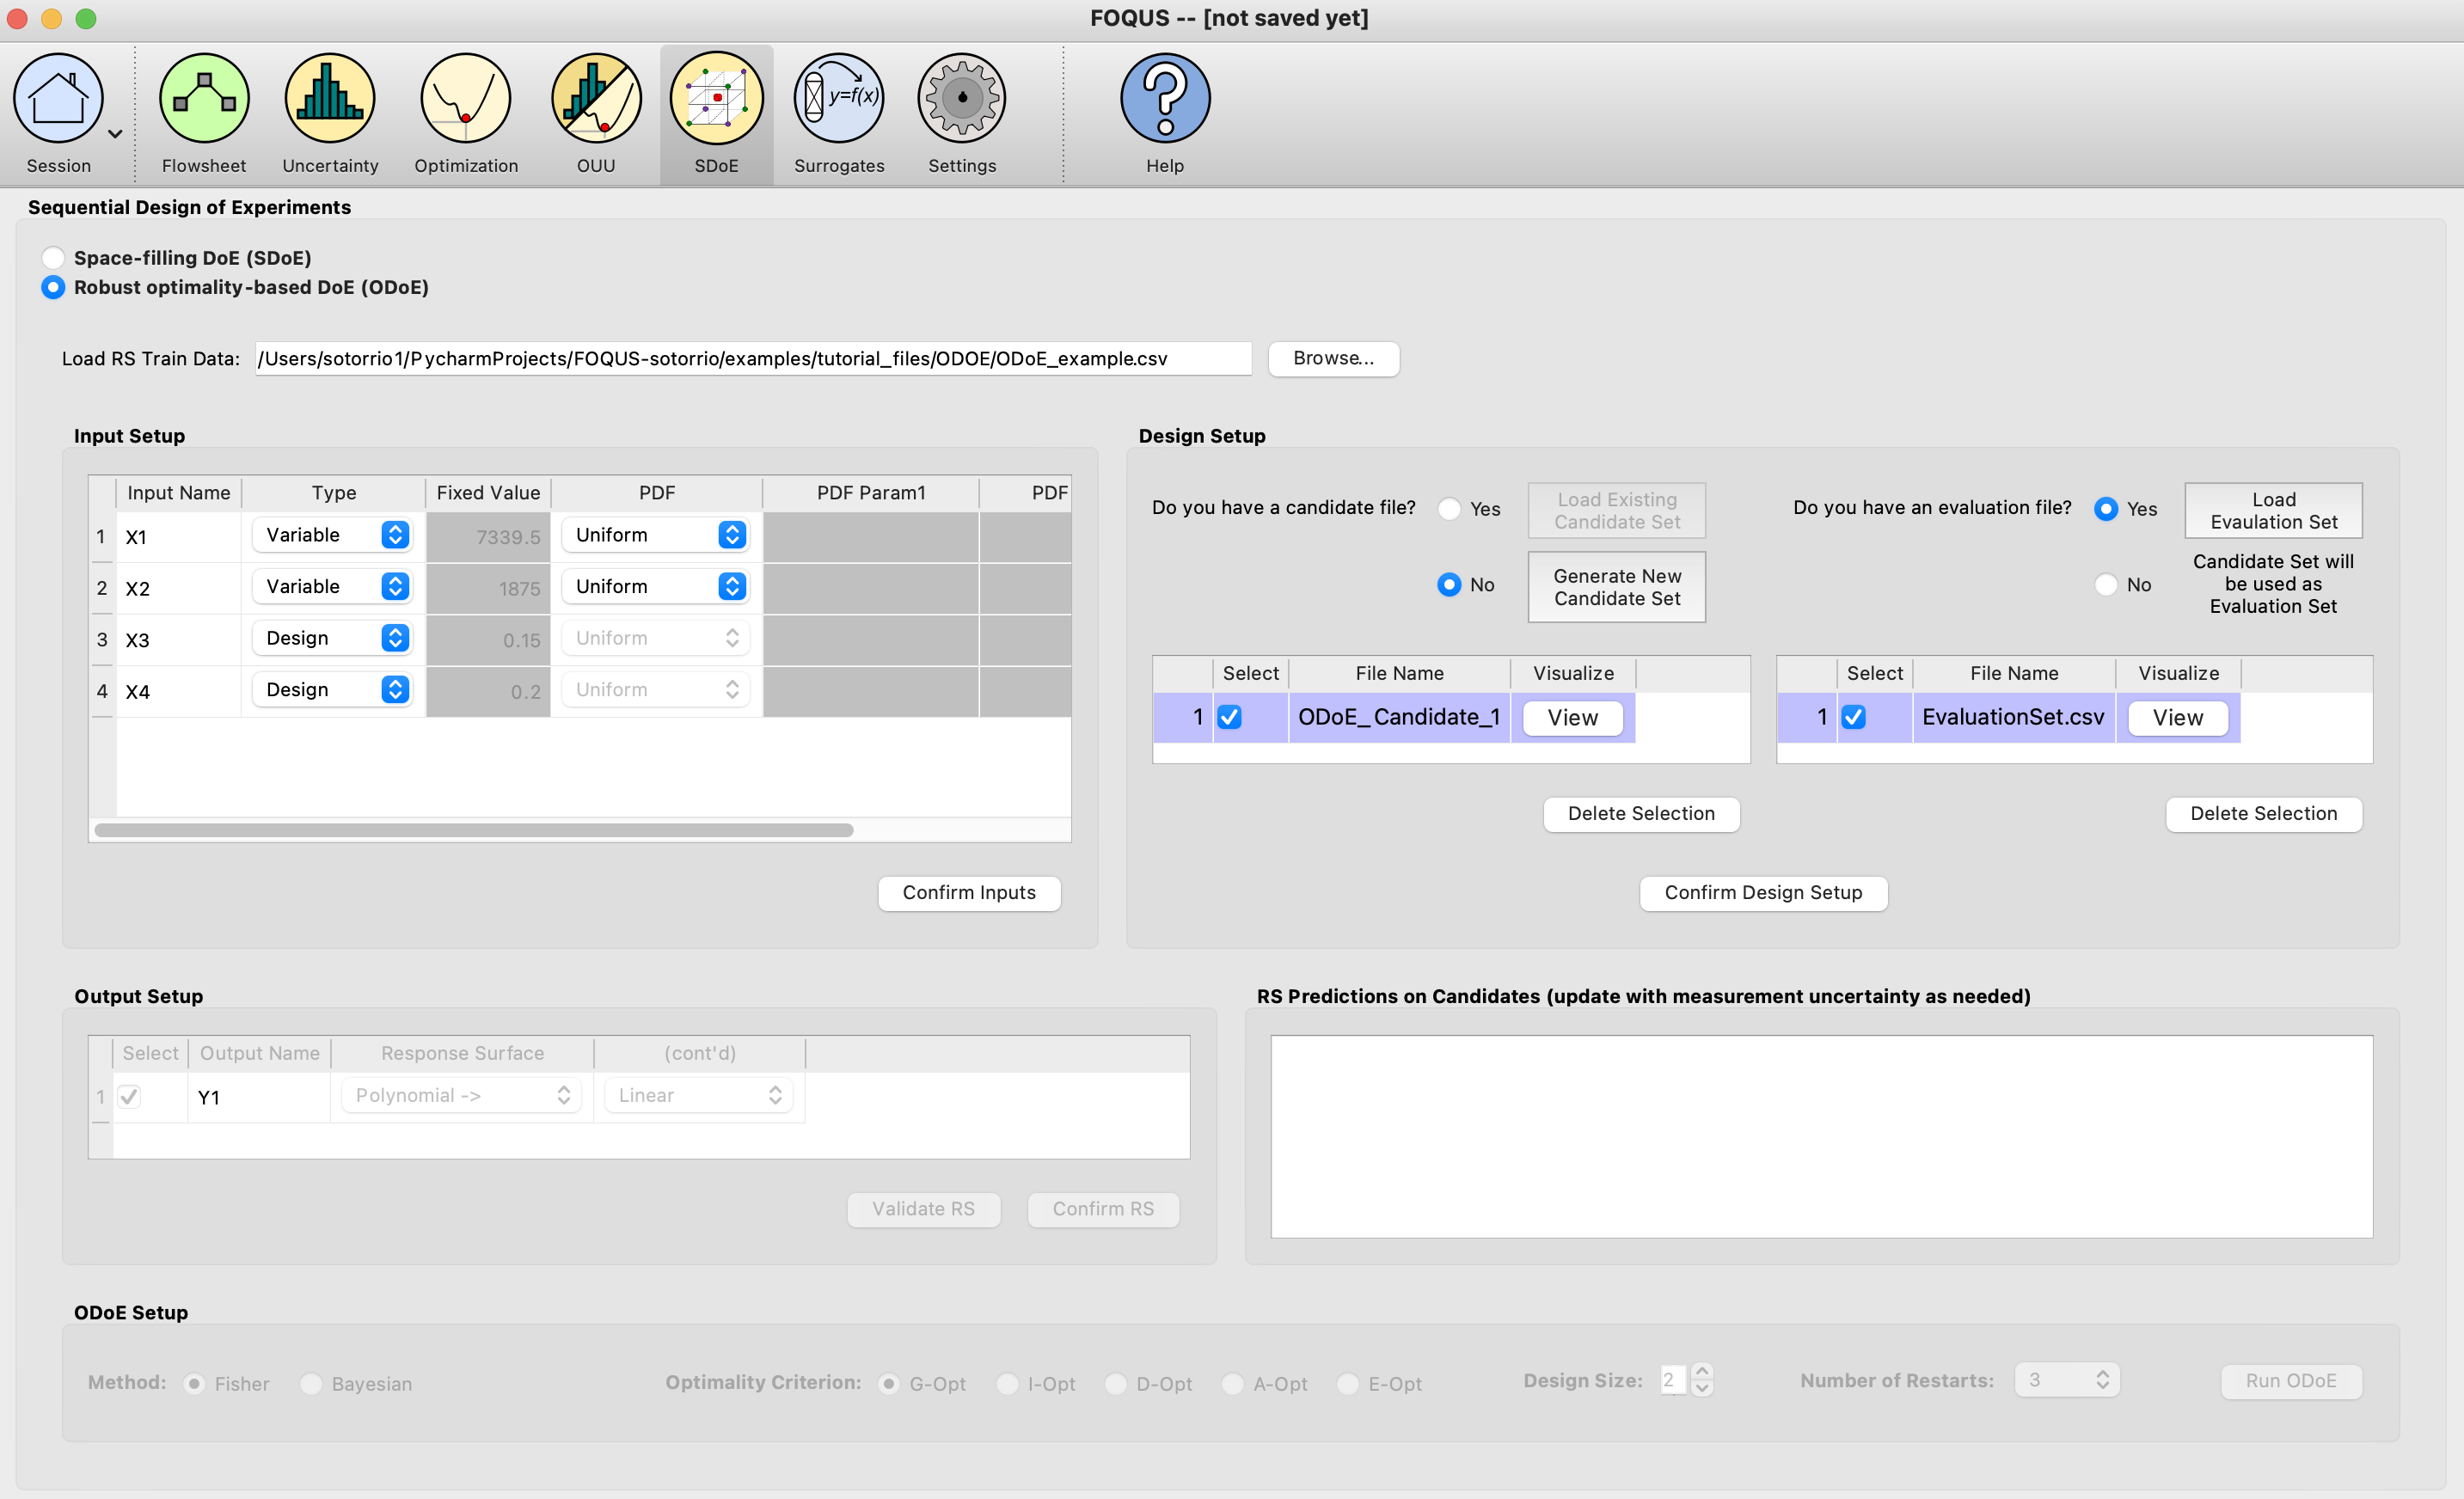
ODoE Candidate and Evaluation Sets
Click on the Confirm Design Setup button and under the Output Setup section, select MARS in the Response Surface dropdown menu.
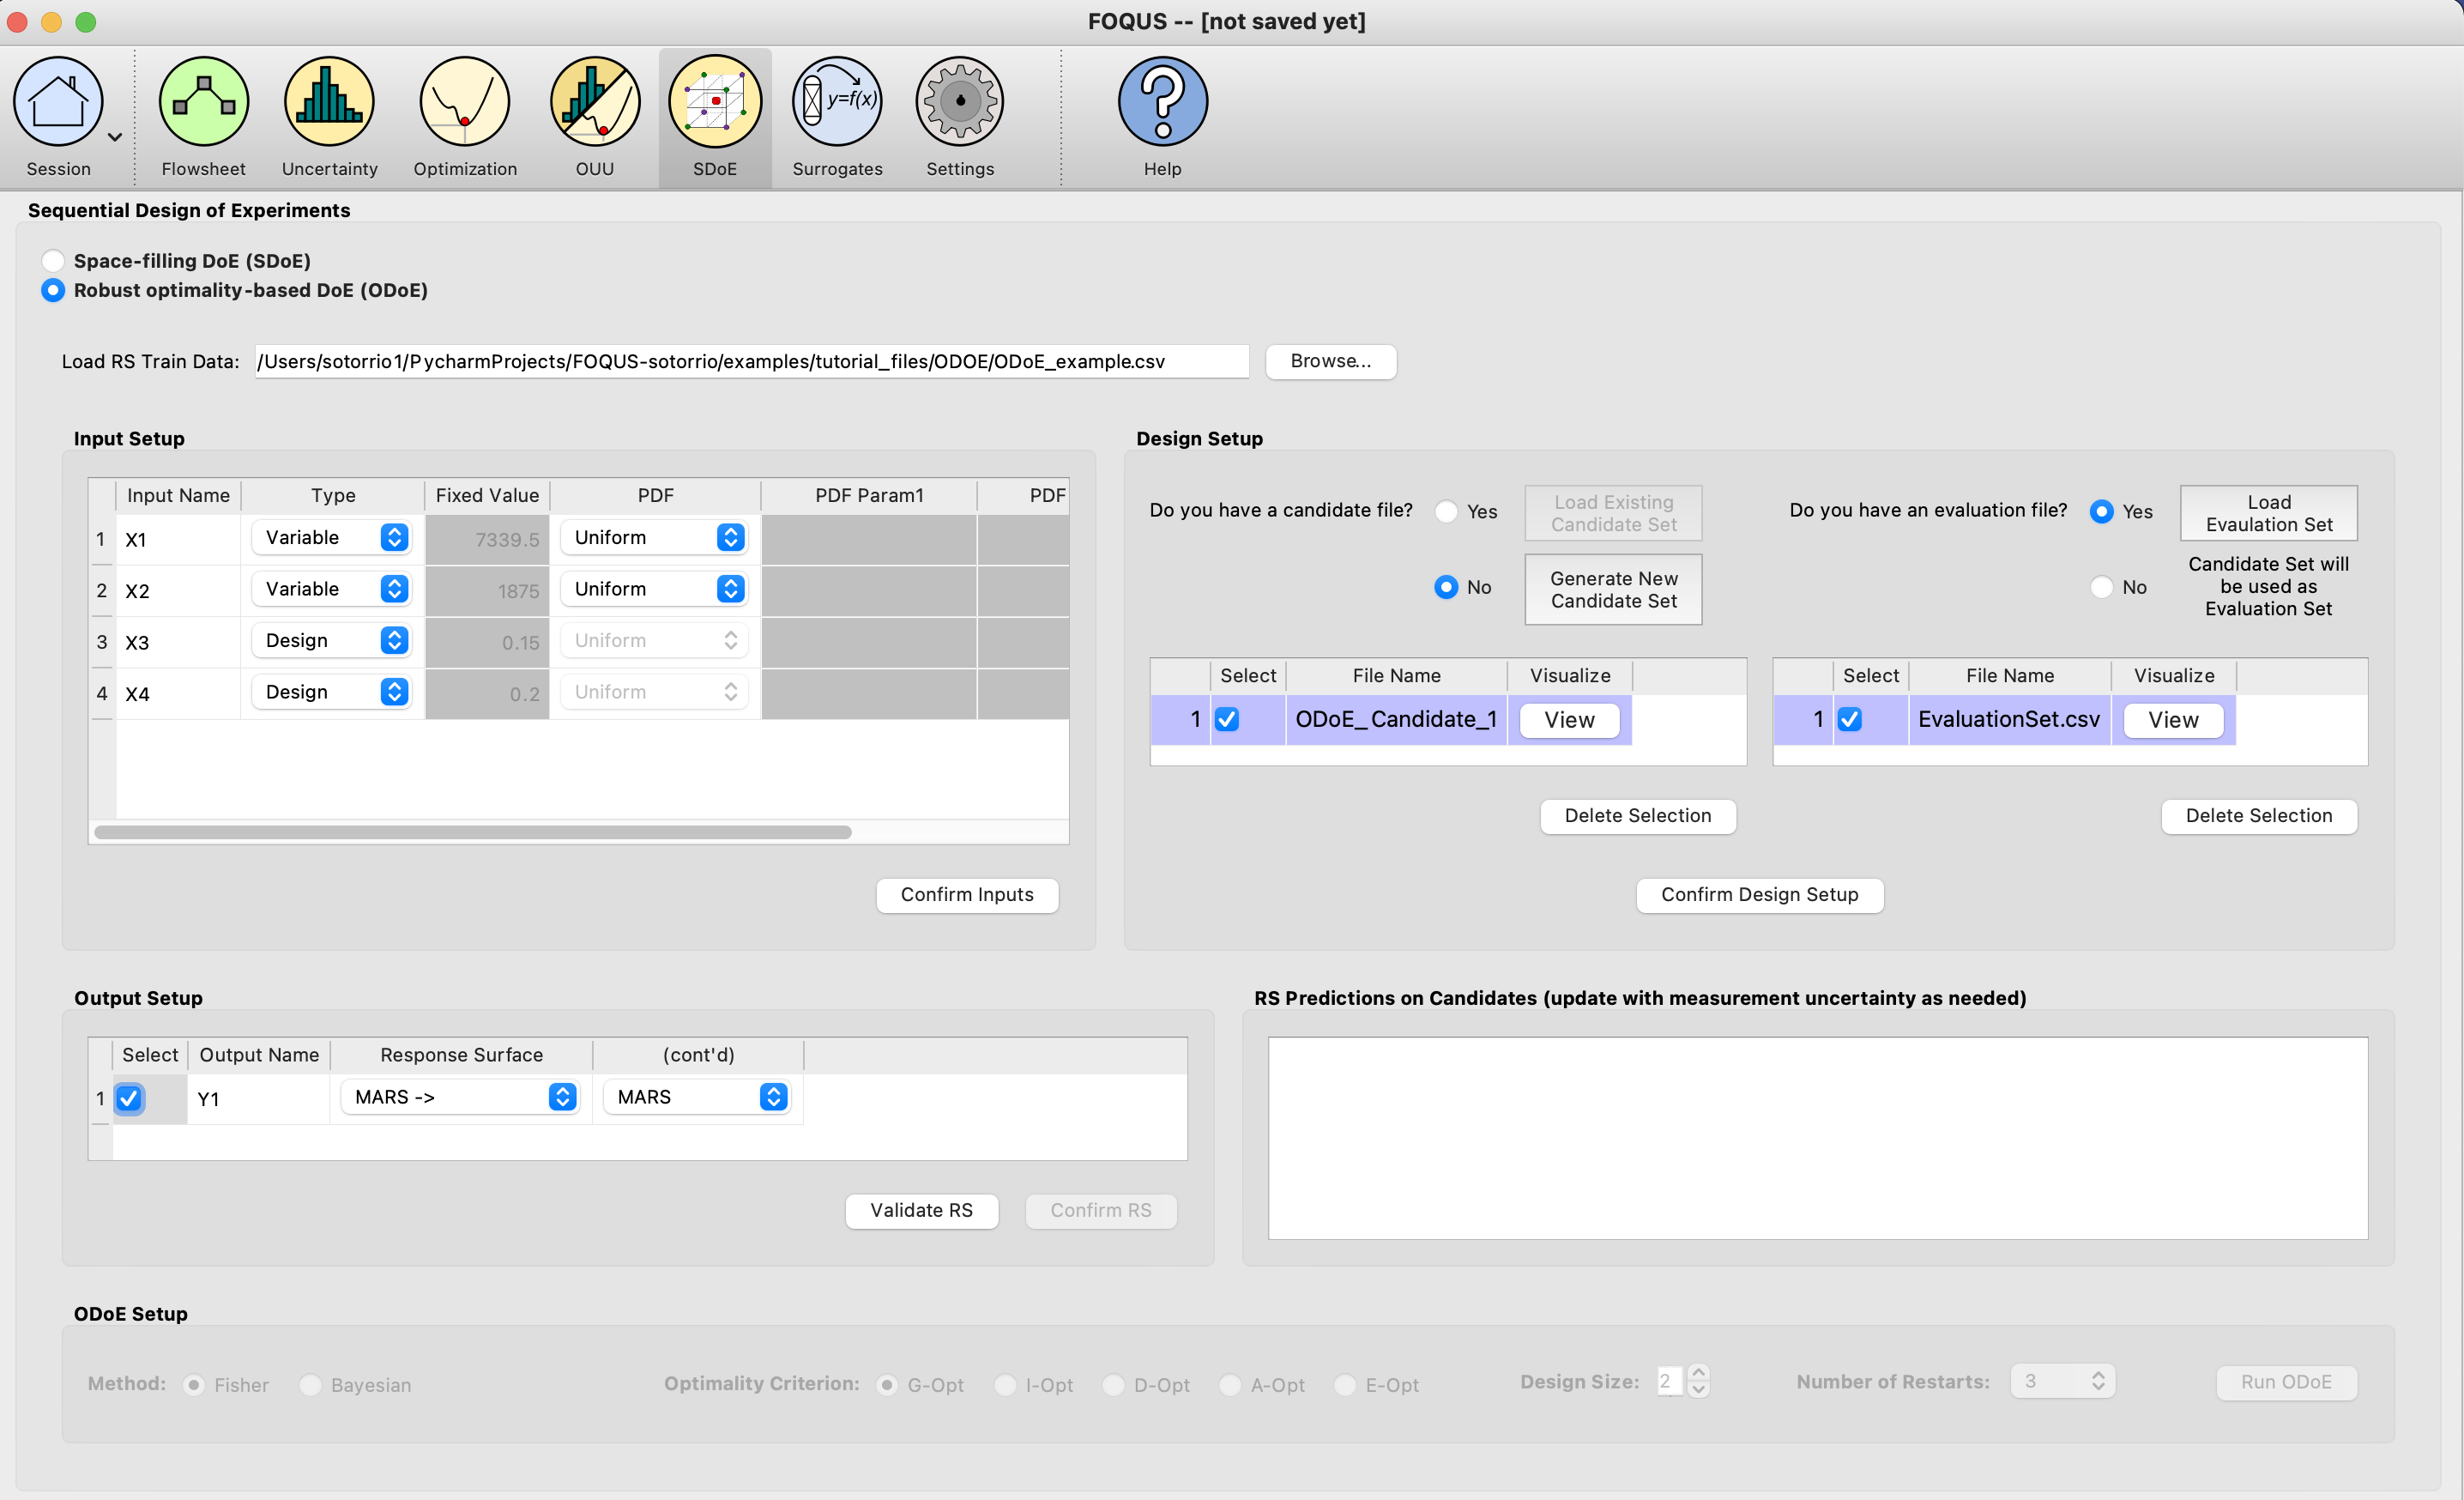
ODoE Output Setup - MARS
Click Validate RS button and the user will get a informative message window and the response surface validation plot.
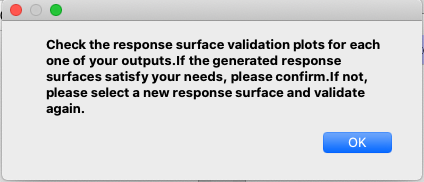
ODoE Response Surface Validation Message
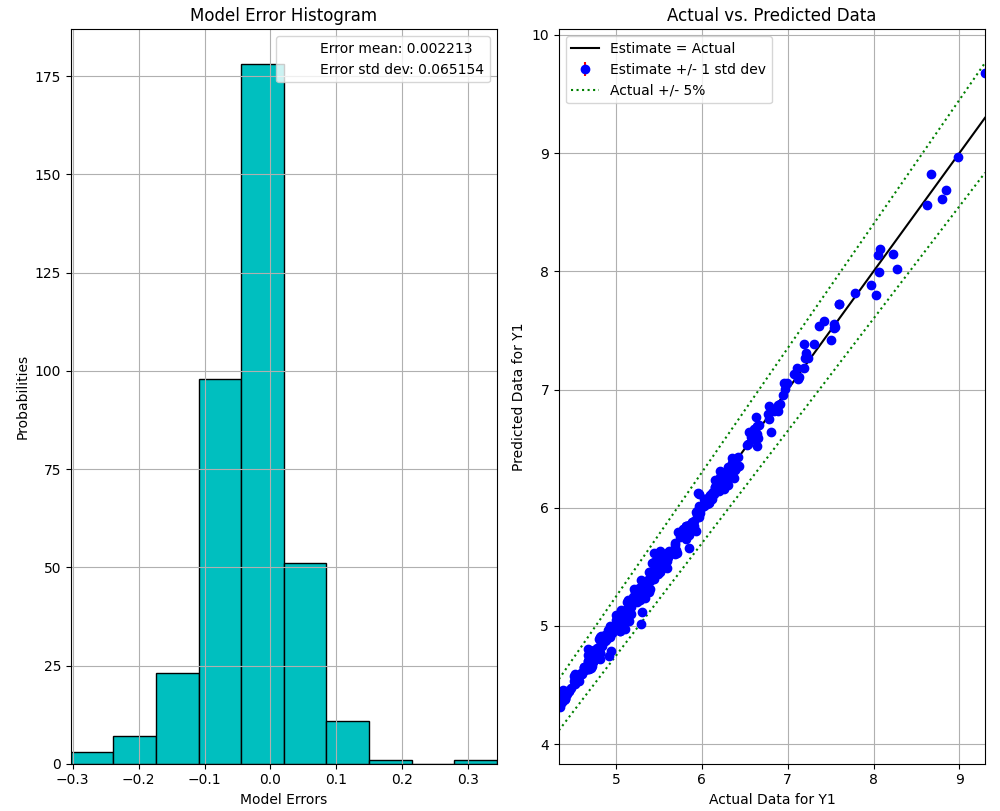
ODoE Response Surface Validation Plot
If the RS selected looks good, you can click the Confirm RS button. The response surface predictions on candidates will get populated in the table on the bottom right corner under RS Predictions on Candidates. The user can edit the mean and standard deviation columns in this table as needed.
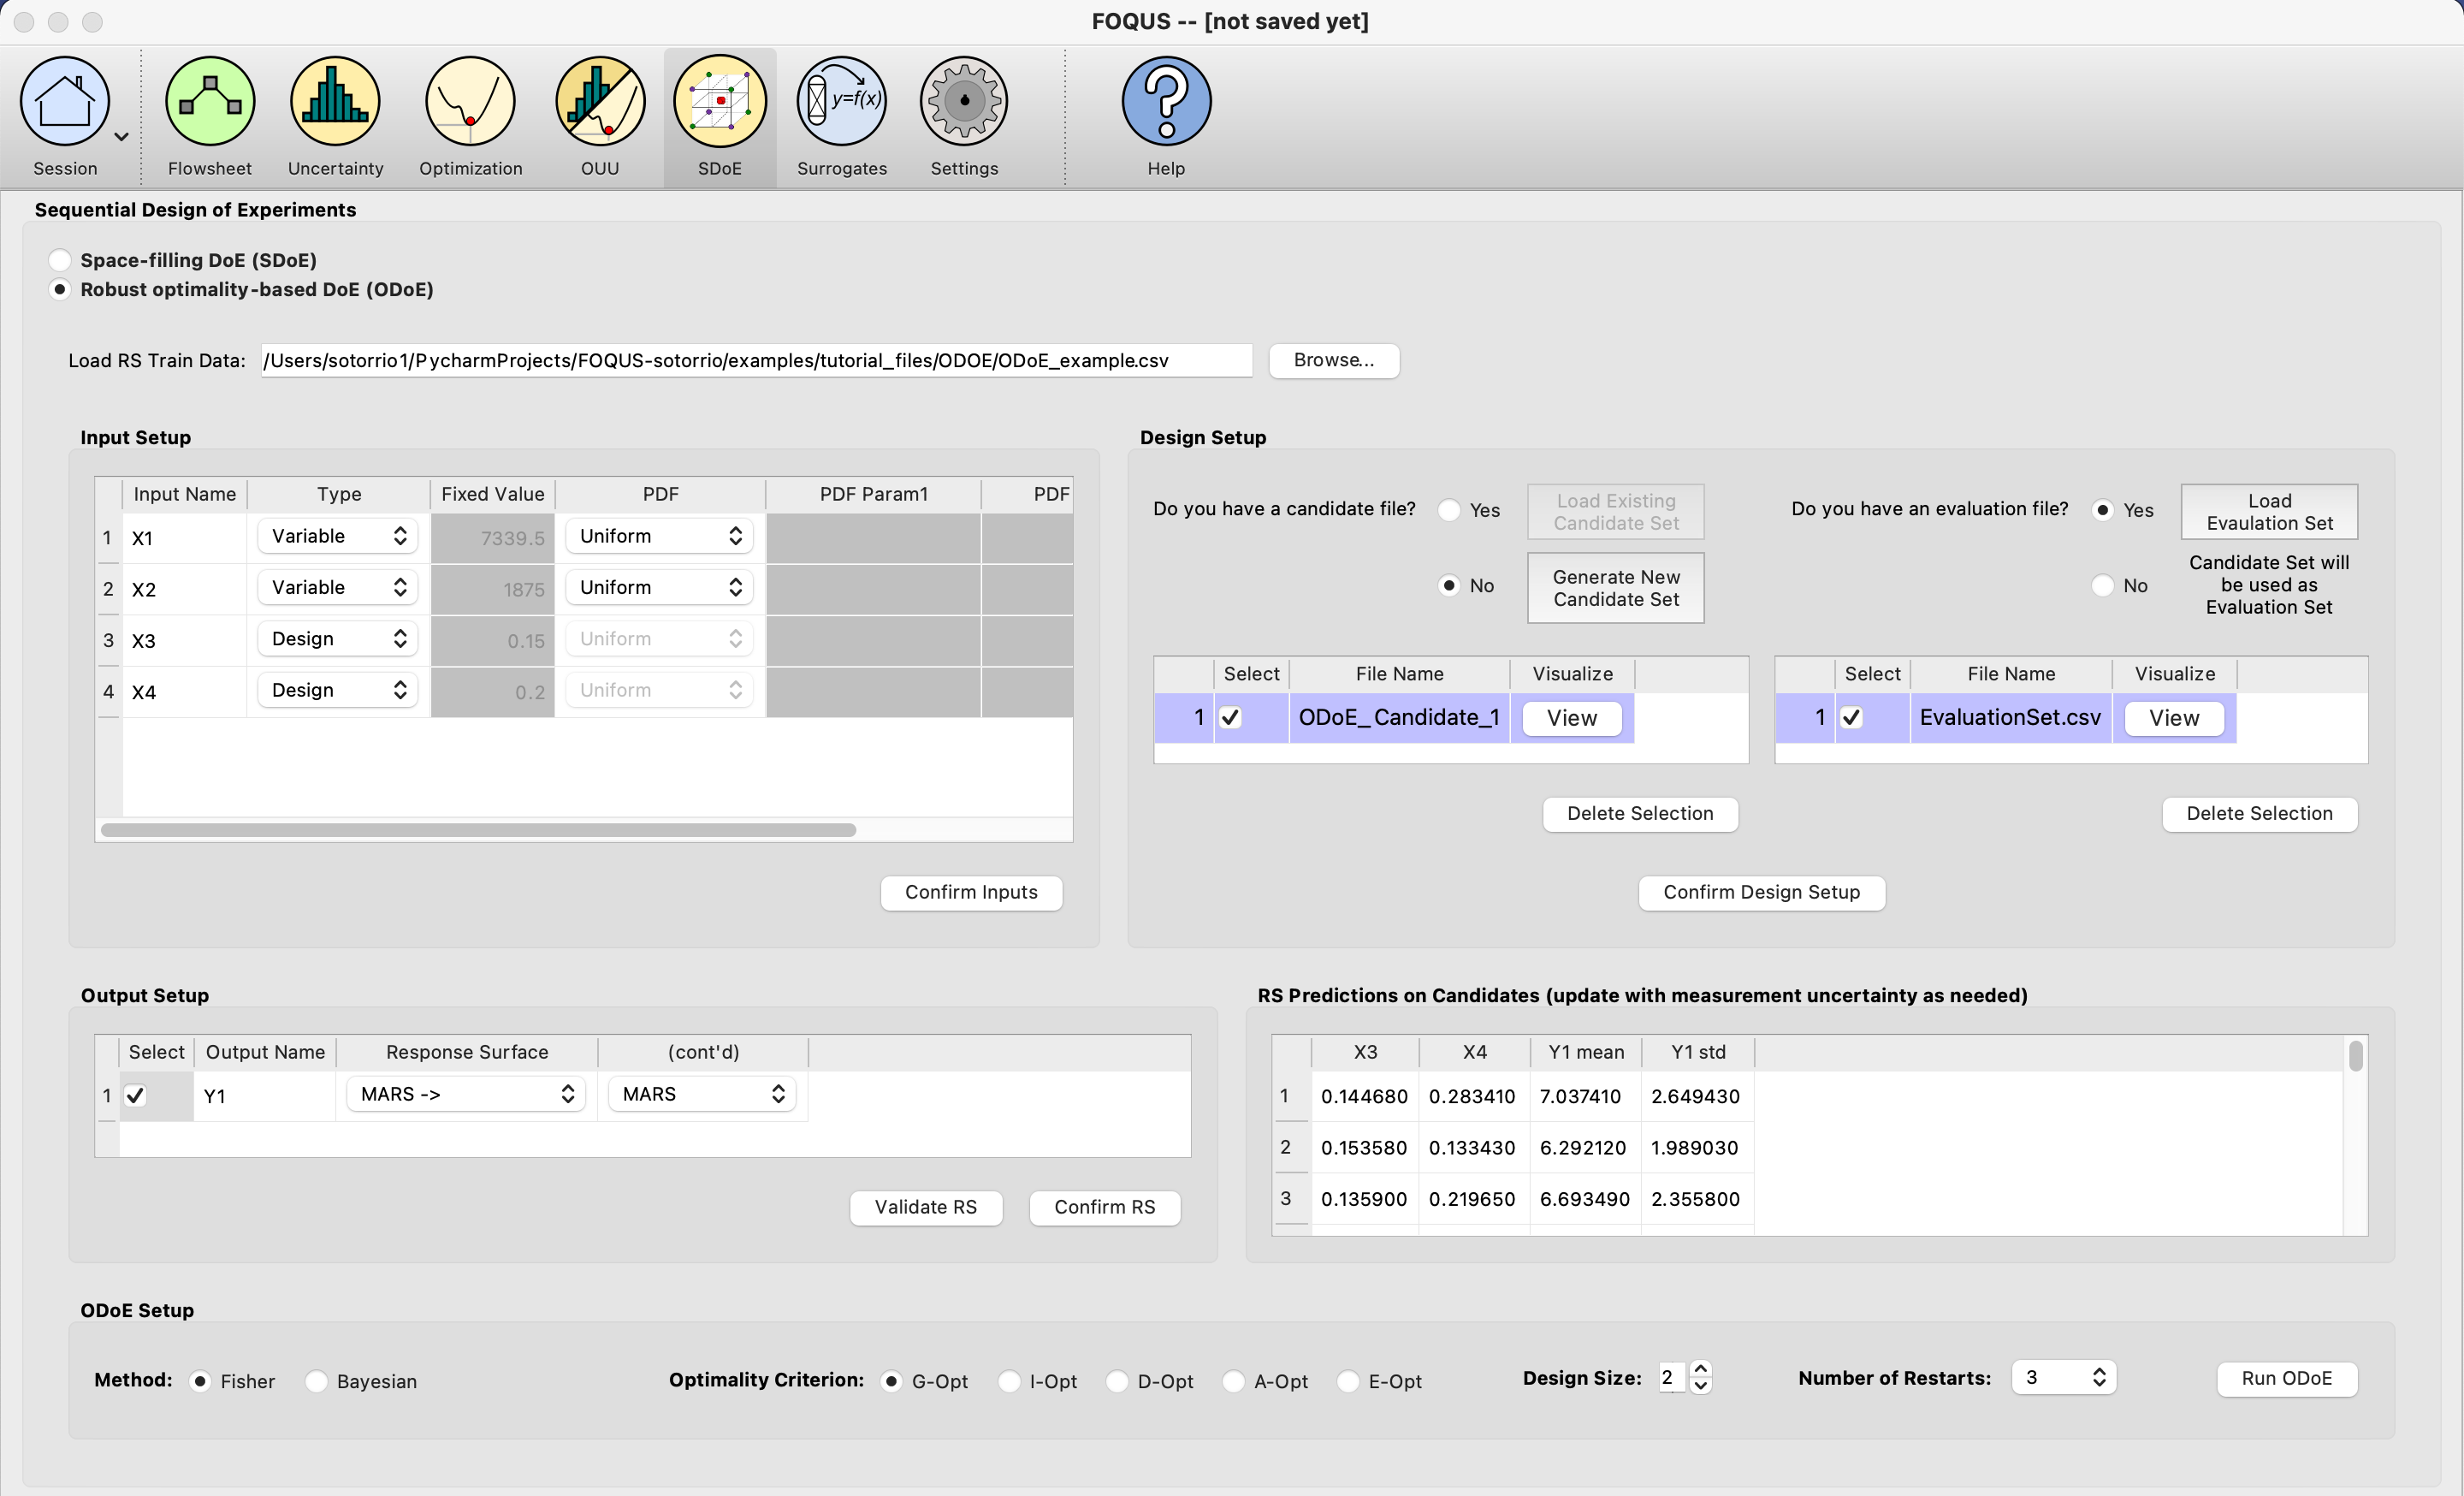
ODoE Response Surface Confirmed and Predictions Generated
Under ODoE Setup select the Method (in this case Fisher), the Optimality Criterion (in this case G-Opt), Design Size (in this case 2) and Number of Restarts (in this case 3).
The choice of optimality criterion to use for design construction is driven by the objectives of the experimenter. If the primary focus of the experimenter is parameter estimation, then selecting the D- or A-optimality criterion is recommended. If the primary objective of the experimenter is precise prediction of the response of interest, then it is best to select the G- or I-optimality criterion. In this case, the experimenter was primarily interested in response prediction, so the G-optimal criterion was selected. Likewise, Design Size and Number of Restarts should be selected to best serve the needs of the experimental objectives. A larger design will allow more information to be collected than a smaller design, but will necessitate the use of more time and other experimental resources. The choice of design size is often dictated by the size of the experimental budget. Furthermore, the choice of Number of Restarts involves a trade-off between the quality of the design generated and the time to generate the design, with more restarts typically resulting in better designs. In this example, both design size and number of restarts were selected to fit within the given budgetary and time constraints of the experimenter.
Once those three parameters are decided, click the Run ODoE button. A window with PSUADE running will show up.
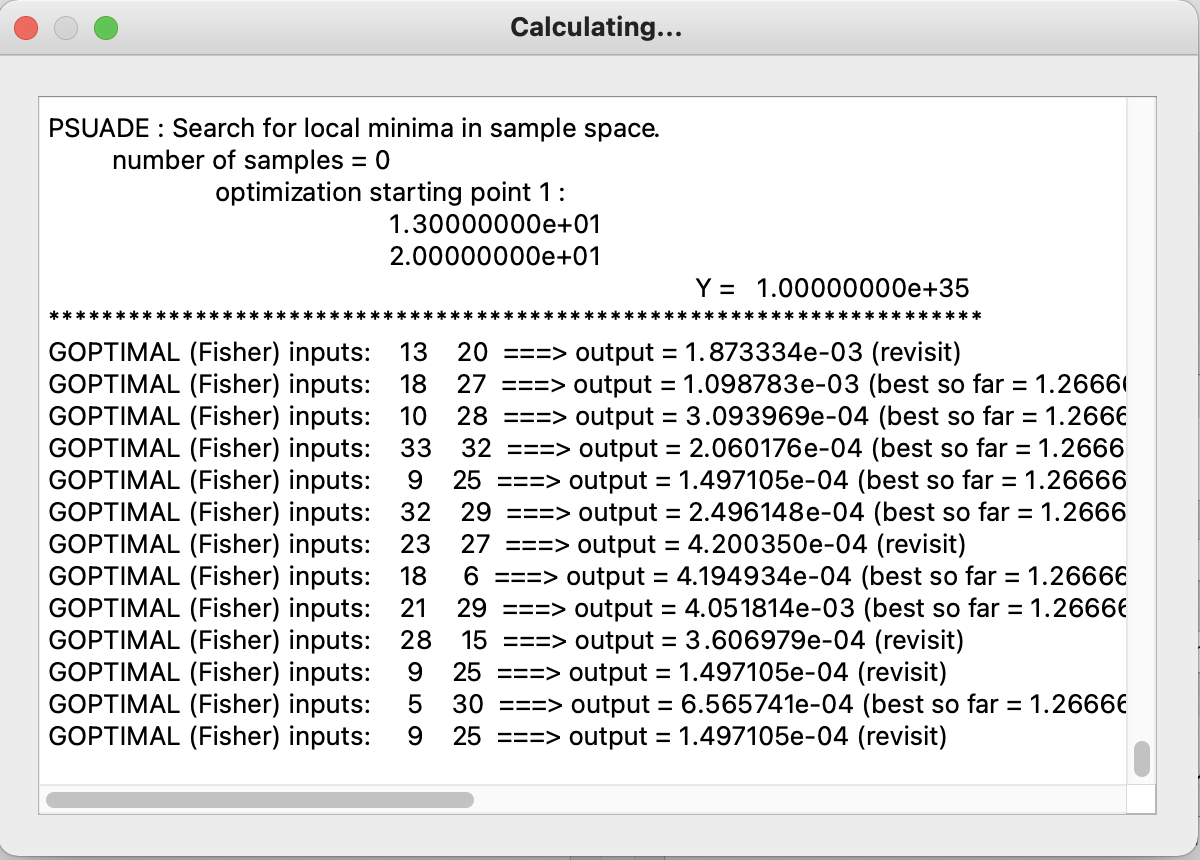
ODoE PSUADE Running Window
Once PSUADE finishes generating the optimality-based design, another window will pop up with results information. A more thorough summary will also be saved in the ODOE_files directory as odoe_results.txt.
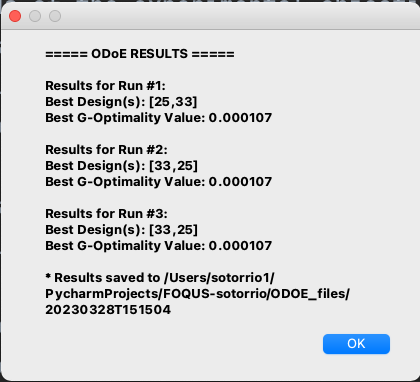
ODoE Results Window
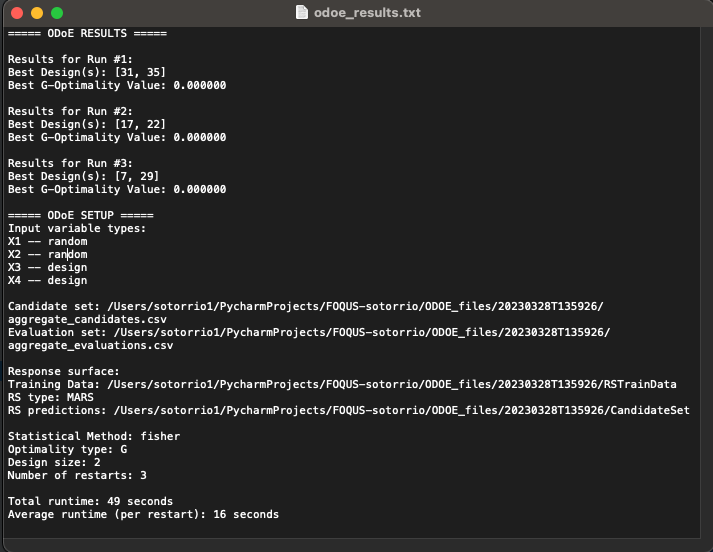
ODoE Results File