Tutorial 2: Data Manipulation
In this tutorial, instructions to change the data before analysis are described. Current capabilities include sample filtering, input/output variable deletion, and output value modification.
The files for this tutorial are located in: examples/tutorial_files/UQ/Tutorial_2
Note
The examples/ directory refers to the location where the FOQUS examples were installed, as described in Install FOQUS Examples.
Filtering
Filtering involves selecting out samples whose values of a certain input or output fall into a certain range. When runs are returned from the Turbine Web API there often are simulations that failed to converge in Aspen, thus the simulation samples corresponding to these failed runs should be excluded from analysis. Follow the steps below to filter out the samples due to failed runs:
Click Load from File on the UQ window (Figure Data Manipulation, Filtering Tab).
Select the file “gmoat5012_9levels.res” in the examplesUQ folder. This file is an actual simulation ensemble that has already been run. To find this file, the user may need to change the file filter to “All files.”
Select the Filtering tab.
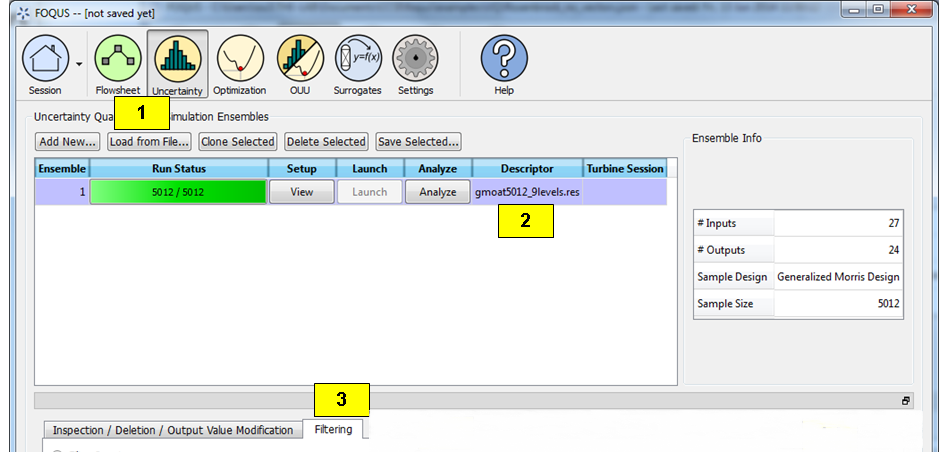
Data Manipulation, Filtering Tab
Filtering the loaded simulation ensemble based on output values is performed.
Click on “New Filter”, and create a filter named “f1”
Add the Filter Expression c(“output.status”) == 0, since the user should keep only the samples in which the output parameter status is “0.”
Click “Done”
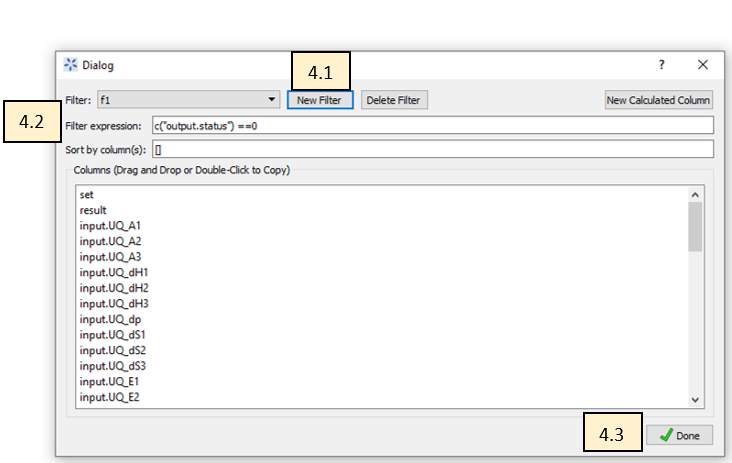
Data Manipulation, Filtering Dialog Box
Select ‘f1’ as the “ Current Filter” in the Flowsheet Result window within “Filtering Tab”
Once the Filtering is complete, click on “Save as New Ensemble” and a new row should be added to the simulation table
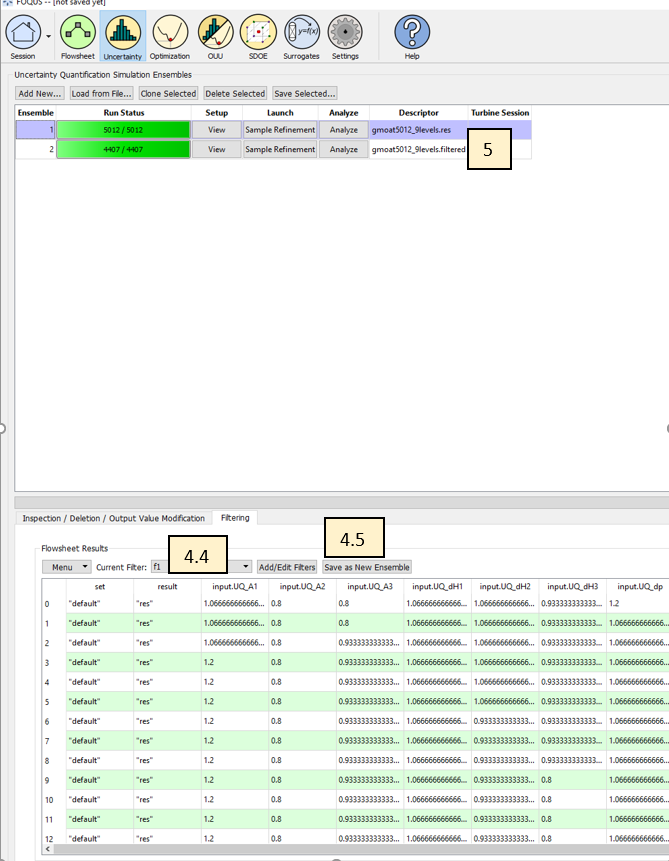
Data Manipulation, Applying the filter
Once filtering is complete, a new row should be added to the simulation table (Figure Data Manipulation, Filtering Results). This ensemble contains only those samples that have a status value of “0.” Analysis can now be performed on this new ensemble because this ensemble contains only the valid simulations (i.e., those with output status value of 0), in which Aspen calculations have properly converged.
Data Manipulation, Filtering Results
Variable Deletion
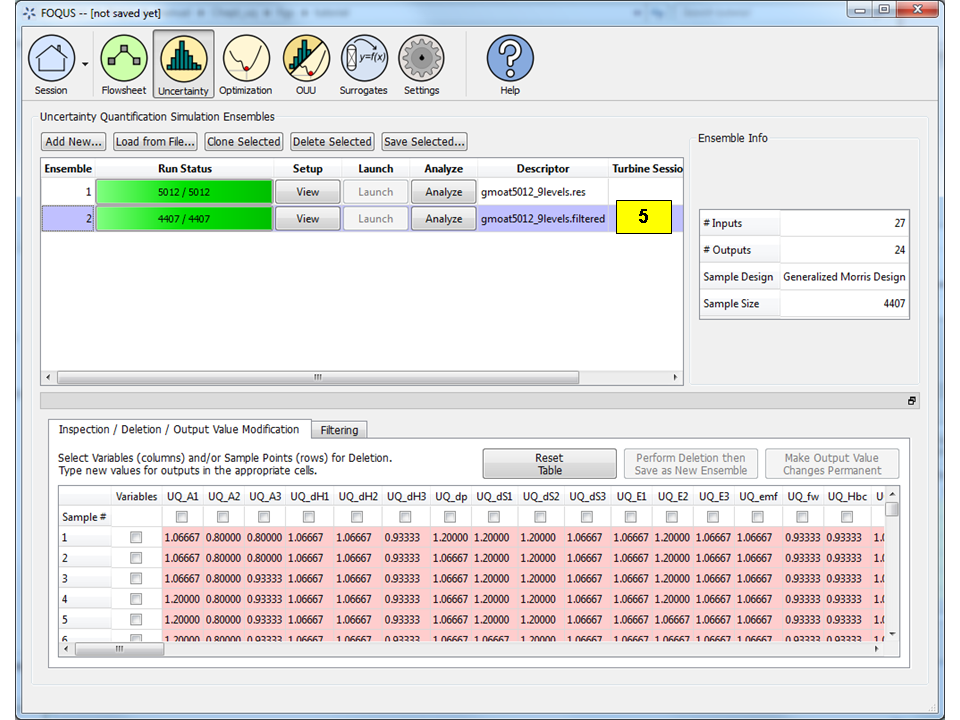
If an input or output variable is to be removed from consideration for analysis, this can be done in the Inspection/Deletion/Output Value Modification tab. Delete the status output from the previous filtering as it is no longer needed for further analysis.
Verify that the ensemble that resulted from filtering is selected. If not, select that ensemble.
Click the Inspection/Deletion/Output Modification tab.
Scroll to the right of the table to the outputs, which are colored yellow.
Select the checkbox corresponding to the “status” output (the first output).
Click Perform Deletion then Save as New Ensemble.
The results are illustrated in Figure Data Manipulation, Inspection/Deletion. Note: The output count has decreased by one for the new ensemble. The user can verify that the “status” output was removed in the new ensemble by viewing this in the Inspection/Deletion/Output Value Modification tab again. Deletion of an input can be performed similarly by selecting its checkbox and clicking the Perform Deletion then Save as New Ensemble button.
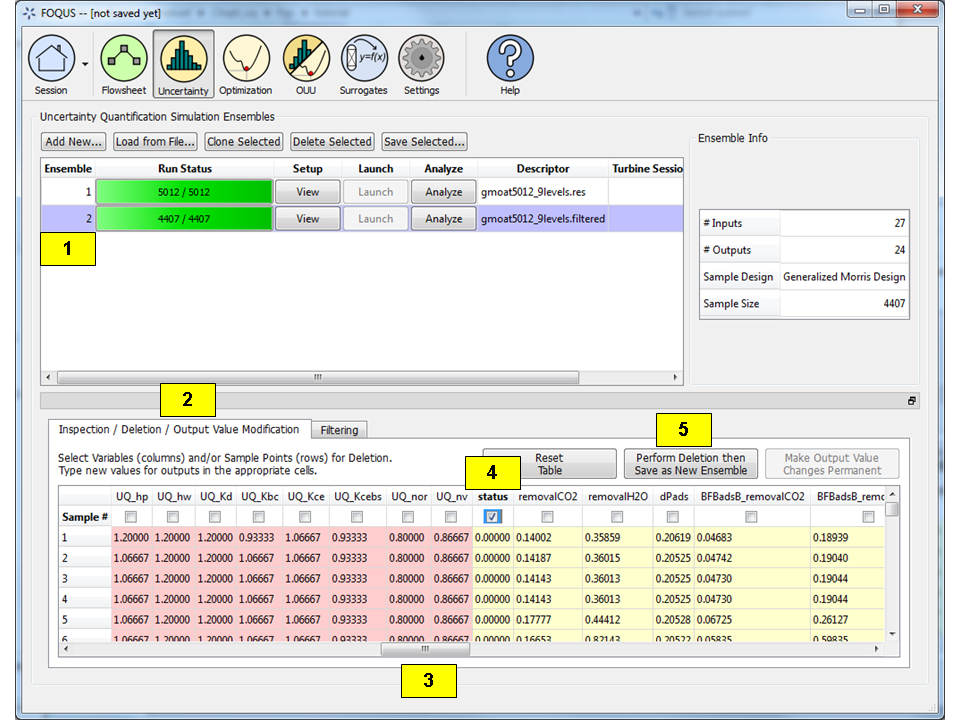
Data Manipulation, Inspection/Deletion
Output Value Modification
To change the value of an output for a sample or several samples, follow steps below:
Select an ensemble.
Click the Inspection/Deletion/Output Value Modification tab.
Scroll to the right to the outputs.
Click on a cell for one of the outputs and enter a new value. Do the same for another cell. Notice that the modified cells turn green. This indicates the cells that have been modified.
Click Make Output Value Changes Permanent to permanently change the values. The modified cells will turn yellow, indicating the permanent change. If the user wishes to reset the table and start over before making changes permanent, click the Reset Table.
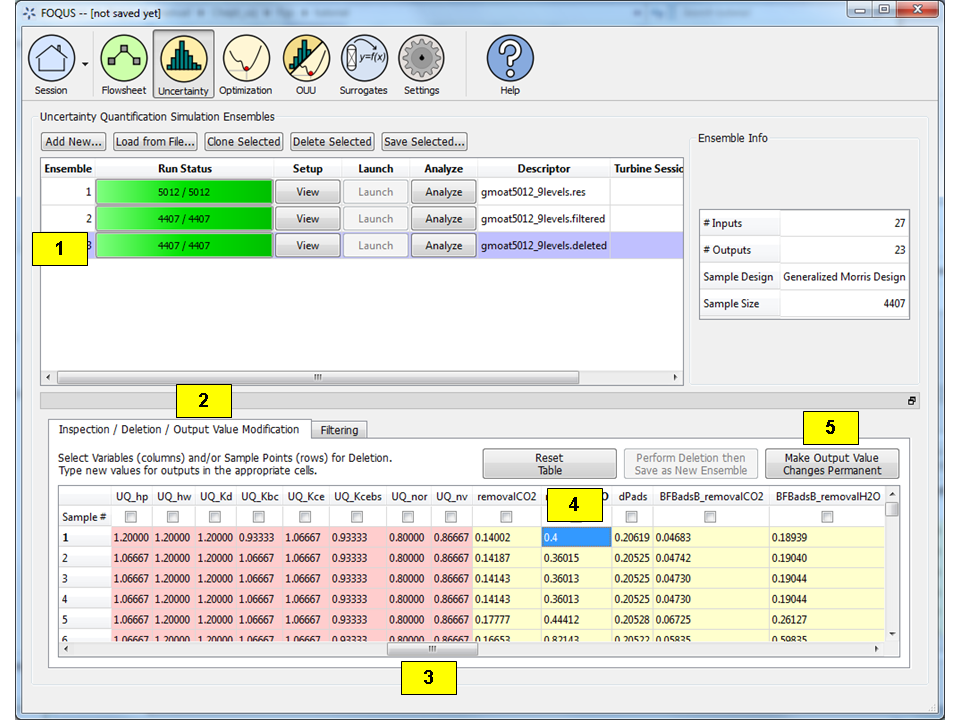
Data Manipulation, Value Modification