Machine Learning & Artificial Intelligence Flowsheet Model Plugins
In addition to data-driven model generation, surrogates may be specified by importing external Python classes. FOQUS supports conversion of custom Pymodel scripts as well as neural network model files into flowsheet node surrogates. The FOQUS session script will automatically load model files from the corresponding working directory folders when the application is launched.
- Plugin – Selecting this model type in the Node Editor displays available Python model classes, which typically contain initialization and run methods to define the model expressions. To use this tool, users must develop a Pymodel script (see the example code below as a guide) and place the file in the appropriate folder user_plugins in the working directory, as shown below. This model type is demonstrated in Section Tutorial 5: Surrogates with the Flowsheet.
- ML_AI – Selecting this model type in the Node Editor displays available neural network models; this tool currently supports TensorFlow Keras model files in hierarchical data format 5 (.h5). To use this tool, users must train and export a Keras model and place the file in the appropriate folder user_ml_ai_plugins in the working directory, as shown below. Optionally, users may save Keras models with custom attributes to display on the node, such as variable labels and bounds. While training a Keras model with custom attributes is not required to use the plugin tool, users must provide the necessary class script if the Keras model does contain a custom object (see below for further information on creating custom objects). This model type is used in the same manner as Pymodel Plugins, per the workflow in Section Tutorial 5: Surrogates with the Flowsheet.
Custom Model Attributes
The high-level neural network library of Keras integrates with TensorFlow’s machine learning library to train complex model within Python’s user-friendly framework. Largely, Keras models may be split into two types: Sequential which build linearly connected model layers, and Functional which build multiple interconnected layers in a complex system. More information on TensorFlow Keras model building is described by (Wu et al. 2020). Users may follow the recommended workflow to install and use TensorFlow in a Python environment, as described in the TensorFlow documentation: https://www.tensorflow.org/install.
When importing TensorFlow Keras models, users should ensure their Python environment contains the same Keras package version used to train the model files. TensorFlow offers limited compatibility between versions. The example files include models trained with TensorFlow 2.3 and 2.7; users with TensorFlow 2.7 should use the 2.7 models.
The ML AI Plugin supports adding neural networks of either type to FOQUS nodes; if a custom object is needed, only the Functional API supports serializing custom attributes. If a model is saved with a custom input layer as shown below, FOQUS will automatically read and import the custom attributes into the Node Editor.
Currently, FOQUS supports the following custom attributes:
- input_labels – list of string objects containing labels for each input variable (default: x1, x2, x3, …)
- input_bounds – list of tuple (pair) objects containing upper and lower bounds for each input variable (default: (0, 1E5))
- output_labels – list of string objects containing labels for each output variable (default: z1, z2, z3, …)
- output_bounds – list of tuple (pair) objects containing upper and lower bounds for each output variable (default: (0, 1E5))
- normalized – Boolean flag for whether the user is passing a normalized neural network model; to use this flag, users must train their models with data in the form below and add all input and output bounds custom attributes. Normalizing uses the data bounds to scale the data values such that the lower bound becomes 0 and the upper bound becomes 1:
The following code snippet demonstrates the Python syntax to train and save a Keras model with custom attributes. The use of Dropout features in training is not required, but decreases the risk of overfitting by minimizing the number of parameters in large models. Similarly, normalizing data often results in more accurate models since features are less likely to be blurred during fitting. Users may then enter unscaled input values and return unscaled output values in the Node Editor. Note that the custom object class script containing the class and the NN model file itself must all share the same name to import the custom attributes into a FOQUS node. If certain custom attributes are not used, users should not include them in the custom class definition.
Users must ensure the proper script name is used in the following places, replacing example_model with the desired model name:
- Custom class signature, class example_model(tf.keras.layers.Layer):
- Creating a callable object, super(example_model, self).__init__()
- Defining the class CONFIG, config = super(example_model, self).get_config()
- Creating the model, layers = example_model(
- Saving the model, model.save(‘example_model.h5’)
- The file names of the .h5 model file and custom class script.
For example, the model name below is ‘mea_column_model’. See the example files in examples >> other_files >> ML_AI_Plugin for complete syntax and usage. The folder contains a second model with no custom layer to demonstrate the plugin defaults. To run the models, copy mea_column_model.h5, mea_column_model.py and AR_nocustomlayer.h5 into the working directory folder user_ml_ai_models. The default output values are not calculated, so the node should be run to obtain the correct output values for the entered inputs.
# Required imports
>>> import numpy as np
>>> import pandas as pd
>>> import tensorflow as tf

# Example follows the sequence below:
    # 1) Main Code at end of file to import data and create model
    # 2) Call create_model() to define inputs and outputs
    # 3) Call custom layer object to define network structure, which uses
    #    call() to define layer connections and get_config to attach
    #    attributes to the custom layer
    # 4) Back to create_model() to compile and train model
    # 5) Back to code at end of file to save the model

# custom class to define Keras NN layers and serialize (register) objects
>>> @tf.keras.utils.register_keras_serializable()  # first non-imports line to include in working directory example_model.py
>>> class mea_column_model(tf.keras.layers.Layer):
        # give training parameters default values, and set attribute defaults to None
>>>     def __init__(self, n_hidden=1, n_neurons=12,
>>>                  layer_act='relu', out_act='sigmoid',
>>>                  input_labels=None, output_labels=None,
>>>                  input_bounds=None, output_bounds=None,
>>>                  normalized=False, **kwargs):

>>>         super(mea_column_model, self).__init__()  # create callable object

        # add attributes from training settings
>>>         self.n_hidden = n_hidden
>>>         self.n_neurons = n_neurons
>>>         self.layer_act = layer_act
>>>         self.out_act = out_act

        # add attributes from model data
>>>         self.input_labels = input_labels
>>>         self.output_labels = output_labels
>>>         self.input_bounds = input_bounds
>>>         self.output_bounds = output_bounds
>>>         self.normalized = True  # FOQUS will read this and adjust accordingly

        # create lists to contain new layer objects
>>>         self.dense_layers = []  # hidden or output layers
>>>         self.dropout = []  # for large number of neurons, certain neurons
                              # can be randomly dropped out to reduce overfitting

>>>         for layer in range(self.n_hidden):
>>>             self.dense_layers.append(
>>>                 tf.keras.layers.Dense(
>>>                     self.n_neurons, activation=self.layer_act))

>>>         self.dense_layers_out = tf.keras.layers.Dense(
>>>             2, activation=self.out_act)

        # define network layer connections
>>>     def call(self, inputs):

>>>         x = inputs  # single input layer, input defined in create_model()
>>>         for layer in self.dense_layers:  # hidden layers
>>>             x = layer(x)  # h1 = f(input), h2 = f(h1), ... using act func
>>>         for layer in self.dropout:  # no dropout layers used in this example
>>>             x = layer(x)
>>>         x = self.dense_layers_out(x)  # single output layer, output = f(h_last)

>>>         return x

        # attach attributes to class CONFIG
>>>     def get_config(self):
>>>         config = super(mea_column_model, self).get_config()
>>>         config.update({  # add any custom attributes here
>>>             'n_hidden': self.n_hidden,
>>>             'n_neurons': self.n_neurons,
>>>             'layer_act': self.layer_act,
>>>             'out_act': self.out_act,
>>>             'input_labels': self.input_labels,
>>>             'output_labels': self.output_labels,
>>>             'input_bounds': self.input_bounds,
>>>             'output_bounds': self.output_bounds,
>>>             'normalized': self.normalized
>>>         })
>>>         return config


# method to create model
>>> def create_model(data):

>>>     inputs = tf.keras.Input(shape=(np.shape(data)[1],))  # create input layer

>>>     layers = mea_column_model(  # define the rest of network using our custom class
>>>         input_labels=xlabels,
>>>         output_labels=zlabels,
>>>         input_bounds=xdata_bounds,
>>>         output_bounds=zdata_bounds,
>>>         normalized=True
>>>     )

>>>     outputs = layers(inputs)  # use network as function outputs = f(inputs)

>>>     model = tf.keras.Model(inputs=inputs, outputs=outputs)  # create model

>>>     model.compile(loss='mse', optimizer='RMSprop', metrics=['mae', 'mse'])

>>>     model.fit(xdata, zdata, epochs=500, verbose=0)  # train model

>>>     return model

# Main code

# import data
>>> data = pd.read_csv(r'MEA_carbon_capture_dataset_mimo.csv')

>>> xdata = data.iloc[:, :6]  # here there are 6 input variables/columns
>>> zdata = data.iloc[:, 6:]  # the rest are output variables/columns
>>> xlabels = xdata.columns.tolist()  # set labels as a list (default) from pandas
>>> zlabels = zdata.columns.tolist()  #    is a set of IndexedDataSeries objects
>>> xdata_bounds = {i: (xdata[i].min(), xdata[i].max()) for i in xdata}  # x bounds
>>> zdata_bounds = {j: (zdata[j].min(), zdata[j].max()) for j in zdata}  # z bounds

# normalize data
>>> xmax, xmin = xdata.max(axis=0), xdata.min(axis=0)
>>> zmax, zmin = zdata.max(axis=0), zdata.min(axis=0)
>>> xdata, zdata = np.array(xdata), np.array(zdata)
>>> for i in range(len(xdata)):
>>>     for j in range(len(xlabels)):
>>>         xdata[i, j] = (xdata[i, j] - xmin[j])/(xmax[j] - xmin[j])
>>>     for j in range(len(zlabels)):
>>>         zdata[i, j] = (zdata[i, j] - zmin[j])/(zmax[j] - zmin[j])

>>> model_data = np.concatenate((xdata,zdata), axis=1)  # Keras requires a Numpy array as input

# define x and z data, not used but will add to variable dictionary
>>> xdata = model_data[:, :-2]
>>> zdata = model_data[:, -2:]

# create model
>>> model = create_model(xdata)
>>> model.summary()

# save model
>>> model.save('mea_column_model.h5')
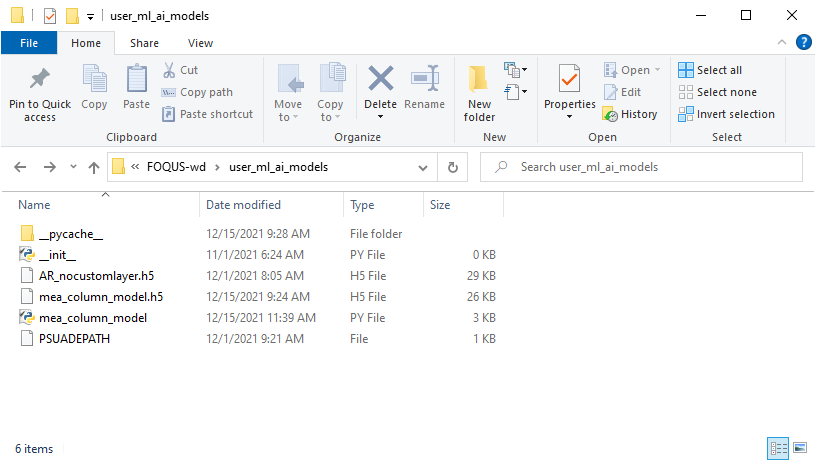
After training and saving the model, the files should be placed in the working directory folder as shown below; if FOQUS cannot find the custom class due to a missing or misnamed script, the node will not load the attributes. As noted above, only the custom class lines should be included in the script:
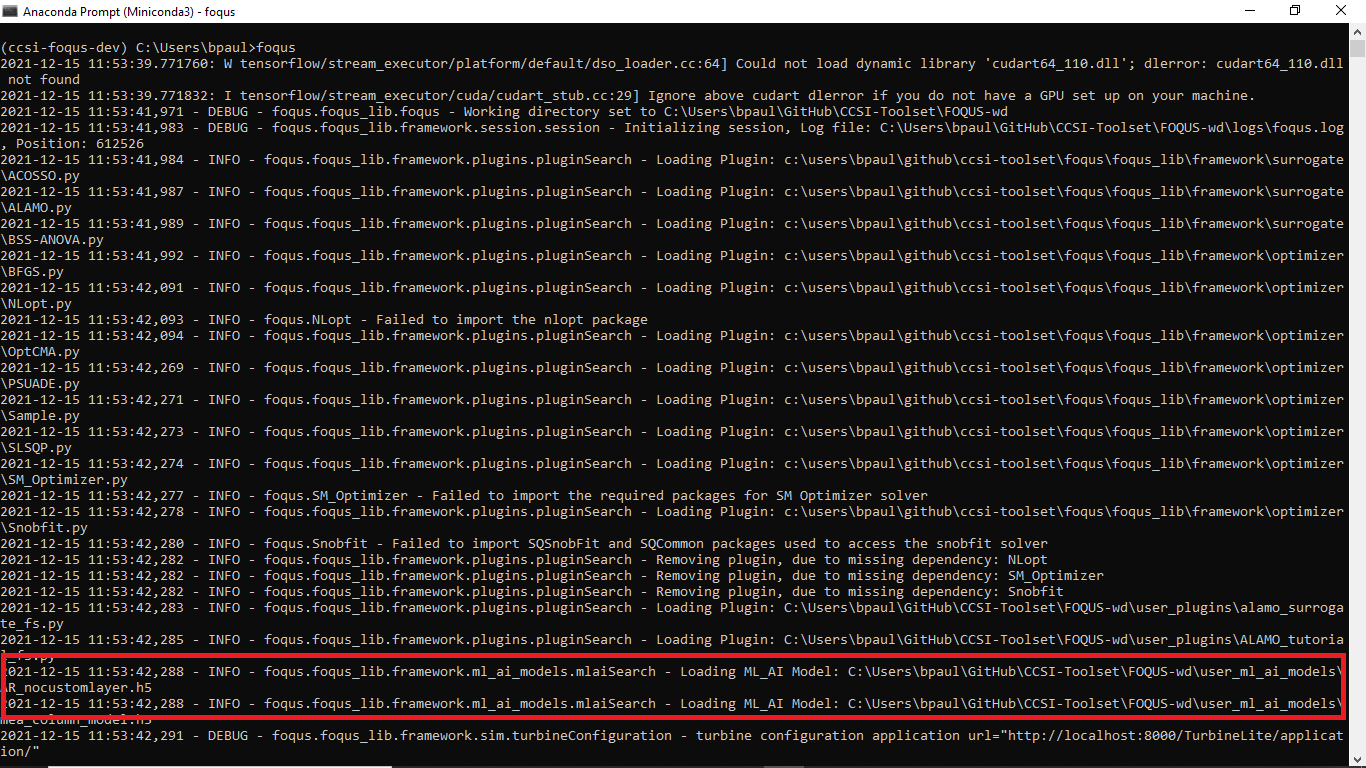
Upon launching FOQUS, the console should include the lines boxed in red below to show the model files have been successfully loaded:
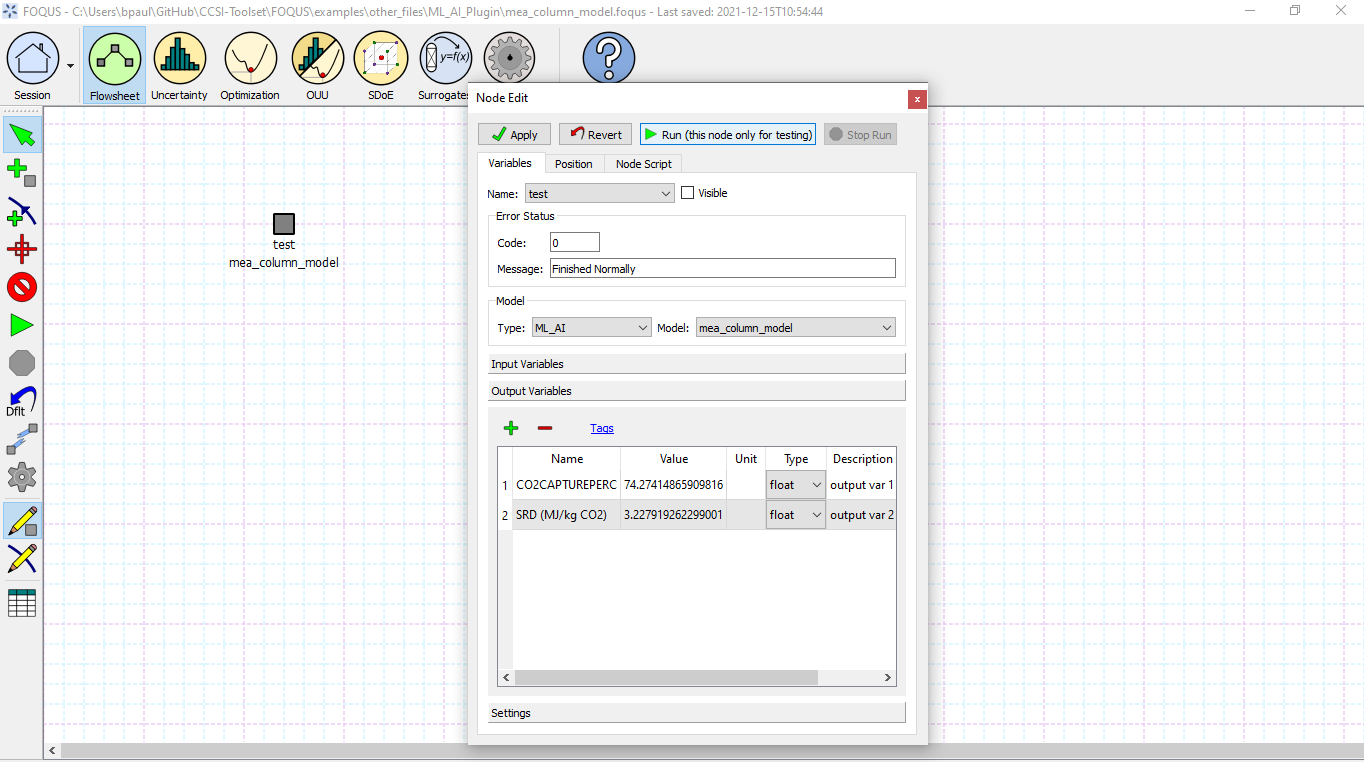
The model will then appear in the Node Editor menu: